
User experience (UX) is one of the fundamental pillars in mobile application development. As an iOS Developer, you know that any friction point can lead to user frustration or, even worse, app abandonment. One of the critical moments where this friction usually appears is during data entry. Fortunately, modern Swift programming offers us fantastic tools to mitigate this problem.
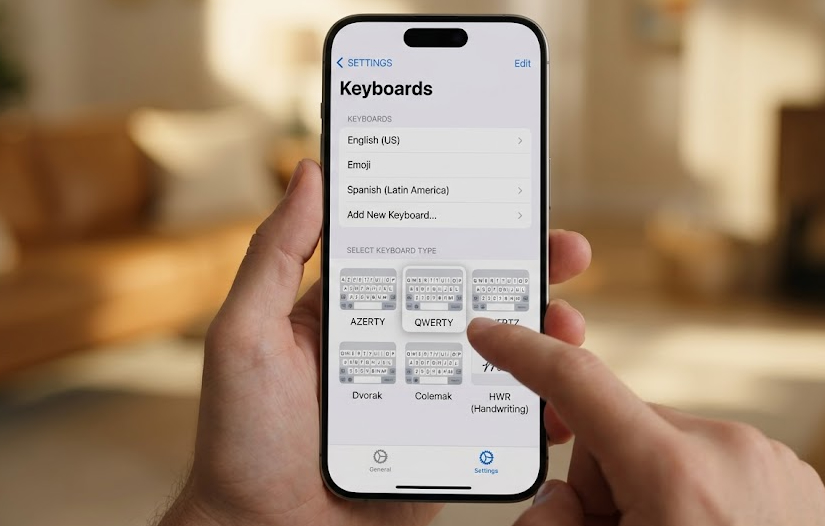
In this extensive tutorial, we will dive deep into the world of forms and text entry, exploring all the keyboard types in SwiftUI. Knowing when and how to use each of these keyboards will not only speed up data entry for your users but will also reduce errors and make your applications stand out for their professionalism.
Get ready, open Xcode, and join me on this comprehensive tour of the capabilities of SwiftUI applied to the virtual keyboards of the iPhone and iPad.
The Crucial Role of the Right Keyboard in SwiftUI
When working with SwiftUI, the main view for text entry is the TextField (or TextEditor for multiline texts). By default, when a user taps on a text field, iOS displays the standard alphanumeric keyboard. However, what happens if we are asking the user to enter their phone number, age, or email address?
Forcing the user to manually switch to the numeric keypad or search for the “@” symbol is a bad design practice. This is where the .keyboardType() modifier comes into play. This Swift modifier allows us to specify exactly which variant of the system keyboard we want to display, adapting to the nature of the required data.
Prerequisites
To follow this tutorial, you need:
- A Mac with an updated macOS.
- Xcode installed (preferably the latest version to take advantage of the latest SwiftUI features).
- Basic knowledge of Swift programming and the view structure in SwiftUI.
Analyzing Keyboard Types in SwiftUI
The SwiftUI API inherits much of its keyboard types from the UIKeyboardType enumeration in UIKit. Below, as every good iOS Developer should know, we will break down each of them based on the official documentation and community resources like HolySwift.
1. .default (The Default Keyboard)
It is the standard keyboard that appears if you do not apply any modifier. It contains the full alphabet, predictive suggestions, and access to numbers and symbols through the shift button.
TextField("Type your name", text: $name)
    .keyboardType(.default) // Optional, this is the default behavior
When to use it: For names, addresses, general descriptions, and messages.
2. .asciiCapable
Visually it is very similar to the default keyboard, but with a crucial technical difference: it restricts input to characters from the ASCII standard. This means it will omit special characters, emojis, or non-Latin alphabets.
TextField("Create a username", text: $username)
    .keyboardType(.asciiCapable)
When to use it: For usernames, legacy passwords, or legacy systems that do not support UTF-8 encoding or complex Unicode.
3. .numbersAndPunctuation
This keyboard displays numbers and punctuation marks by default, although it allows switching to the alphabetical keyboard. It is excellent for inputs that contain a mixture of numbers and mathematical or formatting symbols.
TextField("Enter product reference", text: $productRef)
    .keyboardType(.numbersAndPunctuation)
When to use it: Reference codes, simple mathematical equations, or alphanumeric identifiers where numbers are predominant.
4. .URL
Browsing the web requires specific characters like the forward slash / and the .com ending. This keyboard replaces the space bar (or shrinks it) to make room for these quick access buttons.
TextField("Your website", text: $websiteUrl)
    .keyboardType(.URL)
    .autocapitalization(.none) // Always recommended with URLs
When to use it: Profile forms asking for a website, in-app browsers, or server configurations.
5. .numberPad
One of the most used keyboard types in SwiftUI. It displays a pure numeric keypad (from 0 to 9), without punctuation marks, decimals, or letters. It is straightforward and to the point.
TextField("Enter your PIN", text: $pinCode)
    .keyboardType(.numberPad)
When to use it: PIN codes, age, product quantities, SMS verification codes (OTP).
6. .phonePad
Similar to the numberPad, but designed specifically for phone numbers. Therefore, it includes the * and # characters, in addition to the + sign (by long-pressing the 0) for international codes.
TextField("Phone number", text: $phoneNumber)
    .keyboardType(.phonePad)
When to use it: Exclusively for phone numbers in registration forms or user profiles.
7. .namePhonePad
This is an interesting and hybrid keyboard. By default, it shows the standard alphabetical keyboard for typing a name, but the switch-to-numbers button takes you to a phonePad style keyboard instead of the standard punctuation keyboard.
TextField("Name or Phone", text: $nameOrPhone)
    .keyboardType(.namePhonePad)
When to use it: Login screens where the user can enter either their username or their phone number.
8. .emailAddress
For any iOS Developer, this is a lifesaver. It optimizes the standard keyboard by adding the @ symbol and the . period right next to the space bar.
TextField("Email address", text: $email)
    .keyboardType(.emailAddress)
    .textInputAutocapitalization(.never)
When to use it: Logins, newsletter subscriptions, contact forms.
9. .decimalPad
Often confused with the numberPad, the decimalPad includes a period (or comma, depending on the device’s regional settings) for entering numbers with decimals.
TextField("Enter the price", text: $price)
    .keyboardType(.decimalPad)
When to use it: Financial applications (money), calculators, health applications (weight, height), and any metric input.
10. .twitter (or Social Keyboard)
Historically called the Twitter keyboard, it is optimized for the X/Twitter social network and similar applications. It adds a quick access to the at symbol @ for mentions and the hashtag # for tags.
TextField("Write a tweet", text: $tweetText)
    .keyboardType(.twitter)
When to use it: Social media clients, comment sections where mentions are allowed, or tagging systems.
11. .webSearch
Similar to the default keyboard or the URL keyboard, but the return key (“Enter”) transforms into a “Go” or “Search” button, prompting immediate action.
TextField("Search the web", text: $searchQuery)
    .keyboardType(.webSearch)
When to use it: Search bars within your application, exploration screens.
12. .asciiCapableNumberPad
A more recent addition and ideal for international Swift programming. It is a pure numeric keypad, but it forces the entered numbers to be ASCII characters (Western 0-9). This prevents users with Arabic or Hindi keyboards from entering their regional numeric characters, which could break backend validation if it is not prepared for them.
TextField("Security code", text: $securityCode)
    .keyboardType(.asciiCapableNumberPad)
When to use it: Interfaces that interact with strict APIs that only accept Western digits (ASCII 0-9).
Practical Implementation in Xcode
Let’s see how an iOS Developer would integrate all these keyboard types in SwiftUI into a complex registration form. Open Xcode and copy the following code into your ContentView.swift.
import SwiftUI

struct RegistrationView: View {
    // State variables to capture input
    @State private var name: String = ""
    @State private var email: String = ""
    @State private var phone: String = ""
    @State private var age: String = ""
    @State private var website: String = ""
    @State private var expectedSalary: String = ""
    @State private var twitterHandle: String = ""

    var body: some View {
        NavigationView {
            Form {
                Section(header: Text("Personal Data")) {
                    TextField("Full Name", text: $name)
                        .keyboardType(.default)

                    TextField("Email Address", text: $email)
                        .keyboardType(.emailAddress)
                        .textInputAutocapitalization(.never) // Prevents auto-capitalization
                        .disableAutocorrection(true)

                    TextField("Phone", text: $phone)
                        .keyboardType(.phonePad)

                    TextField("Age", text: $age)
                        .keyboardType(.numberPad)
                }

                Section(header: Text("Professional Information")) {
                    TextField("Portfolio / Website", text: $website)
                        .keyboardType(.URL)
                        .textInputAutocapitalization(.never)
                        .disableAutocorrection(true)

                    TextField("Expected Salary", text: $expectedSalary)
                        .keyboardType(.decimalPad)

                    TextField("Twitter / X Profile", text: $twitterHandle)
                        .keyboardType(.twitter)
                        .textInputAutocapitalization(.never)
                }
            }
            .navigationTitle("SwiftUI Registration")
        }
    }
}

struct RegistrationView_Previews: PreviewProvider {
    static var previews: some View {
        RegistrationView()
    }
}
When compiling this in Xcode and running it in the simulator (make sure to use the software keyboard by pressing Cmd + K), you will notice how the interface smoothly adapts to each field, guiding the user intuitively.
Additional Best Practices in Swift Programming
Knowing the keyboard types in SwiftUI is only half the battle. A true professional applies complementary modifiers to round out the experience:
1. Autocorrection and Capitalization
As we have seen in the code example, keyboards like .emailAddress or .URL should almost always be accompanied by modifiers that disable autocorrection and initial capitalization, since these OS features hinder writing emails or links.
Use .textInputAutocapitalization(.never) and .disableAutocorrection(true) (or .autocorrectionDisabled() in more recent versions of SwiftUI).
2. Hiding the Numeric Keypad
A common frustration in modern Swift programming is that the numberPad, phonePad, and decimalPad keyboards do not have a “Done” or “Enter” button to dismiss them.
In SwiftUI, you can easily manage this using @FocusState to add a “Done” button in a Toolbar pinned to the keyboard (.toolbar { ToolbarItemGroup(placement: .keyboard) { ... } }). This drastically improves the UX, allowing the user to continue with the form once they have finished entering numbers.
3. Accessibility
Remember that by configuring the right keyboard, you not only help visual users, but you also inform the VoiceOver engine about what kind of data is expected, greatly improving the accessibility of your app.
Conclusion
Mastering the details is what separates a good programmer from an excellent iOS Developer. Thoroughly understanding the keyboard types in SwiftUI and applying them correctly is one of those small victories that show empathy for the end user.
Throughout this article, we have explored everything from the .default keyboard to the specific .asciiCapableNumberPad, proving how Swift programming and the Xcode environment provide us with all the necessary tools to create robust and friendly interfaces.