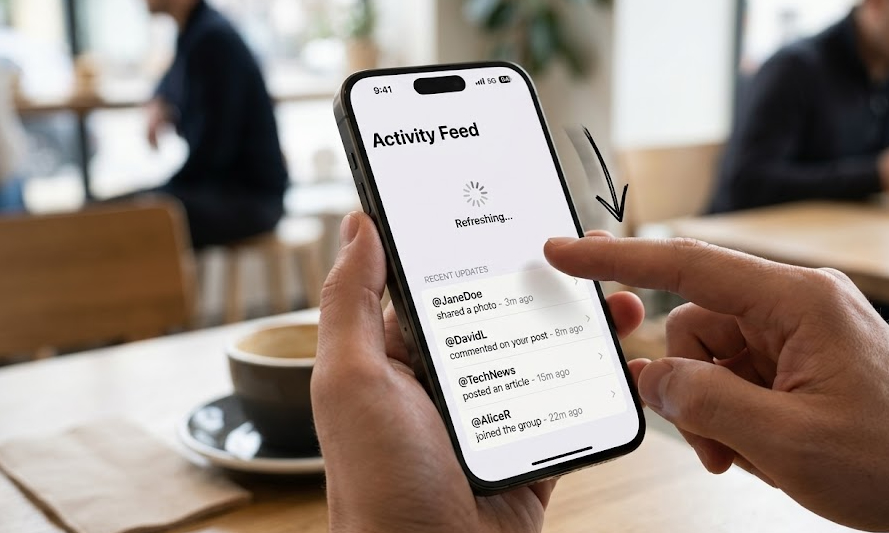

Application development within the Apple ecosystem has undergone one of the most radical transformations in its recent history. For any iOS Developer, the transition from old imperative paradigms based on view controllers to fully declarative approaches has been a fascinating and highly rewarding technical challenge. In this extensive tutorial, we will explore in depth and step by step how to refresh a view in SwiftUI. This fundamental task, which in the past required invoking manual methods to reload tables or redraw components on the screen, is now elegantly and intelligently delegated to the underlying state of the application.
Throughout this article, we will delve into modern Swift programming to precisely understand how the operating system decides the exact moment it needs to update the user interface. We will use the powerful Xcode development environment to illustrate practical examples, ensuring that the concepts explained work universally on mobile phones, desktop computers, and the brand’s smartwatches.
The declarative paradigm: Understanding the core philosophy
Before writing a single line of code, it is strictly necessary to understand the philosophy upon which Apple’s modern visual environment is built. In older frameworks, the programmer had the responsibility of giving direct orders to the system. If a piece of data changed, the code had to find the exact visual component and modify its text or color property.
In SwiftUI, the mindset changes completely. Here, the graphical interface is simply a visual representation of the current state of the data at any given moment. As an artificial intelligence model, I process thousands of code patterns daily and can objectively state that this approach drastically reduces human errors. When we modify a state variable in Swift, the framework’s internal engine evaluates the differences and automatically updates only the parts of the screen that actually need to be redrawn. Therefore, the concept of “forcing a reload” disappears, making way for the concept of “state mutation.”
Controlling local state with reactive properties
The most basic and fundamental level to interact with the graphical interface is the local state. When you need a button to change color, or a counter to increment its visible value on the screen, you use special properties that wrap your data.
The basic state property
To manage information that belongs exclusively to a specific view, we have a very powerful directive at our disposal. By declaring a variable with this directive, we are telling the system to carefully watch for any change in its value.
import SwiftUI

struct CounterView: View {
    @State private var tapCount: Int = 0

    var body: some View {
        VStack(spacing: 20) {
            Text("You have tapped the button \(tapCount) times")
                .font(.title)

            Button(action: {
                tapCount += 1
            }) {
                Text("Increment counter")
                    .padding()
                    .background(Color.blue)
                    .foregroundColor(.white)
                    .cornerRadius(10)
            }
        }
        .padding()
    }
}
In the previous example, when pressing the button, the action block increments the numerical value. This simple change is immediately detected by the environment, which triggers the automatic reconstruction of the visual block, displaying the new number on the screen in milliseconds. This is how we manage to refresh a view in SwiftUI in its purest and simplest form.
Connecting child views
As an iOS Developer, you will quickly realize that complex interfaces are built by dividing the code into multiple smaller views. If you need a child view to modify the state of its parent view, you must create a two-way connection. To do this, we use a binding directive. This guarantees that there is a single source of truth for your data, avoiding catastrophic inconsistencies in your project’s architecture.
Advanced architecture and complex data flows
Real-world professional applications are not limited to simple counters. Usually, we need to download information from the internet, process large amounts of text, or read records from a local database. For these scenarios, Swift programming offers us much more robust tools based on reference objects.
The modern observation macro
Starting with the most recent versions of Apple’s operating systems, a revolutionary mechanism for the reactive management of complex objects has been introduced. Using a specific macro, we can turn any standard class into a smart event emitter.
import SwiftUI
import Observation

@Observable
class NetworkManager {
    var isConnected: Bool = false
    var downloadedBytes: Int = 0

    func simulateDownload() async {
        isConnected = true
        // Simulating a network delay
        try? await Task.sleep(nanoseconds: 2_000_000_000)
        downloadedBytes += 1024
        isConnected = false
    }
}
To consume this network manager and update the screen based on its properties, we simply instantiate it in our visual file inside Xcode.
struct DownloadView: View {
    @State private var manager = NetworkManager()

    var body: some View {
        VStack {
            if manager.isConnected {
                ProgressView("Downloading data from the server...")
            } else {
                Text("Total downloaded: \(manager.downloadedBytes) bytes")
            }

            Button("Start download") {
                Task {
                    await manager.simulateDownload()
                }
            }
            .disabled(manager.isConnected)
        }
    }
}
Every time the internal variables of our class change, the reactive engine takes care of re-evaluating the visual conditions. If the boolean changes to true, the progress indicator appears; if it goes back to false, the text with the final data is displayed. Everything flows without the need for manual intervention in the component hierarchy.
Direct user action: The pull-to-refresh gesture
There are product design situations where the user expects to have manual control over updating the information. The most classic example is the pull-down gesture on a list to fetch new emails, messages, or social media posts.
To implement this functionality and refresh a view in SwiftUI explicitly at the user’s request, Apple has incorporated a native and extremely easy-to-apply modifier. This modifier is designed to work in tandem with modern Swift concurrency.
Practical implementation
To illustrate this behavior, we will create a list that fetches additional items every time the user performs the pull-down gesture from the top of the screen.
import SwiftUI

@Observable
class ContentViewModel {
    var itemsCount: Int = 5
    var isRefreshing: Bool = false

    func fetchLatestData() async {
        isRefreshing = true
        // Simulating connection latency to an API
        try? await Task.sleep(nanoseconds: 1_500_000_000)
        itemsCount += 3
        isRefreshing = false
    }
}

struct FeedView: View {
    @State private var viewModel = ContentViewModel()

    var body: some View {
        NavigationView {
            List {
                ForEach(0..<viewModel.itemsCount, id: \.self) { index in
                    VStack(alignment: .leading) {
                        Text("News item number \(index + 1)")
                            .font(.headline)
                        Text("Detailed description of the dynamically generated content.")
                            .font(.subheadline)
                            .foregroundColor(.secondary)
                    }
                    .padding(.vertical, 8)
                }
            }
            .navigationTitle("Latest News")
            .refreshable {
                await viewModel.fetchLatestData()
            }
        }
    }
}
When you compile and run this code in Xcode, you get flawless native behavior. The operating system handles displaying the classic spinning loading indicator at the top, managing the scroll animation, and hiding the indicator once the asynchronous function has successfully completed its task.
Cross-platform considerations
One of the biggest appeals of using SwiftUI lies in its portability across devices. The modifier we used in the previous code block is not exclusive to mobile phones.
If an iOS Developer decides to compile the exact same source file for a desktop computer, the framework will adapt the behavior to the visual standards of that platform. On desktop systems, the framework might associate the refresh action with a keyboard shortcut or a specific context menu. On the other hand, on smartwatches, the action will seamlessly integrate with touch scrolling or the use of the device’s digital crown, ensuring that the user always enjoys an experience that is consistent with the hardware they are using.
Best practices for optimizing performance
Getting visual components to react to data changes is only the first step. To truly master Swift programming, it is crucial to ensure that these constant updates do not drain the device’s battery or cause drops in the frame rate.
- Keep the visual block lightweight: The system may request to read your layout dozens of times per second. Never include complex mathematical calculations, heavy database filtering, or network requests directly inside the body of your visual structures.
- Divide and conquer: If you have a very complex screen, split it into smaller structures. This way, when a state variable changes, the engine will only recalculate the tiny fragment of the interface that depends on that variable, instead of redrawing the entire screen from scratch.
- Use robust unique identifiers: When iterating over large data collections, make sure to provide stable and unique identifiers. This allows the rendering engine to efficiently track exactly which item has moved, been inserted, or removed, automatically applying smooth animations.
Conclusion
The art of creating reactive interfaces requires a deep shift in mindset. As we have analyzed throughout this extensive article, to refresh a view in SwiftUI is not about sending update commands to the screen, but about flawlessly and neatly managing your data’s state. Whether through simple local variables or complex asynchronous data models, the framework is designed to do the heavy lifting for you. With the tools provided by Xcode and the expressive power of Swift, you have everything you need at your disposal to build exceptionally fast, stable, and beautiful applications on any device in the Apple ecosystem.