Typography is, without a doubt, the fundamental pillar of interface design. For an iOS Developer, breaking away from the monotony of the system font (San Francisco) and applying a brand’s visual identity is an essential skill. Although SwiftUI has greatly simplified interface creation, managing external typography still has its tricks.
In this comprehensive 2000-word tutorial, you won’t just learn how to import a .ttf or .otf file. We are going to dive deep into the correct architecture for managing custom fonts in SwiftUI and Xcode, ensuring your code is scalable, safe, and compatible with Dynamic Type (accessibility) on iOS, macOS, and watchOS.
Step 1: Environment Setup in Xcode
Before writing a single line of Swift programming, we must configure the project correctly. Many common errors stem from here, so pay attention to the details.
1. Import the font files
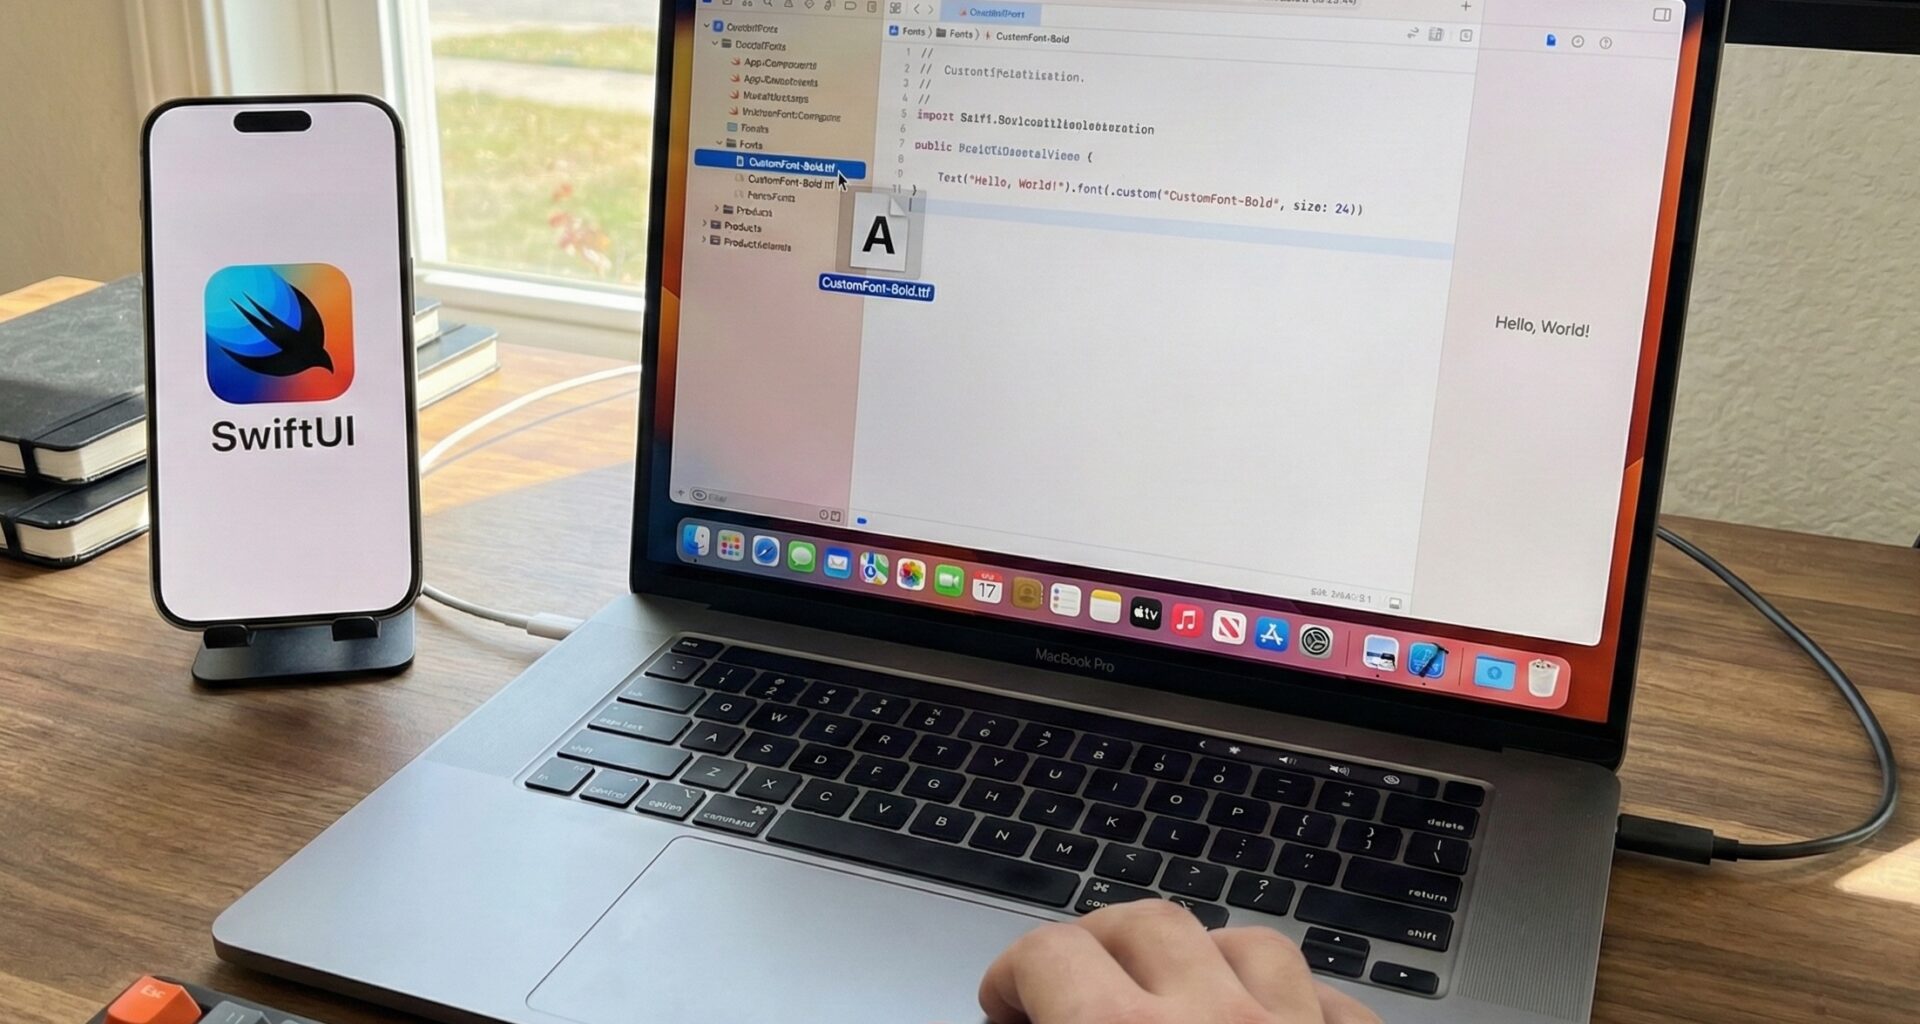
Drag your font files (preferably .otf or .ttf) into your project navigator in Xcode. When you drop the files, a dialog box will appear. It is vital that you check the box “Add to targets” and select your main application.
Note for experts: If you are developing for multiple platforms (e.g., an iOS App with a Watch App extension), you must ensure the font file is checked for both targets in the “File Inspector” (right panel in Xcode).
2. Configure Info.plist
The operating system needs to know these fonts exist. In modern versions of Xcode, this is done in the “Info” tab of the target, or by directly editing the Info.plist file if your project still uses it explicitly.
- Add a new key called “Fonts provided by application” (the raw name is
UIAppFonts). - This will create an Array.
- Add an item for each font file. Important: You must write the full filename, including the extension (e.g.,
Montserrat-Bold.ttf).
Step 2: Discovering the Font’s “Real Name”
This is where 90% of developers fail. The filename (Montserrat-Bold.ttf) is not always the name used in code. You need the “PostScript Name”.
To avoid guessing, I recommend running this small script in your App.swift or in the init of your main view temporarily. This will print all available font names to the console:
import SwiftUI
import UIKit // Necessary to access UIFont in this helper

func printAllFontNames() {
    for family in UIFont.familyNames {
        print("Family: \(family)")
        for name in UIFont.fontNames(forFamilyName: family) {
            print("   - Usage Name: \(name)")
        }
    }
}
// Call this function in the .onAppear of your first view
Step 3: Basic Implementation in SwiftUI
The most direct way to use custom fonts in SwiftUI and Xcode is via the modifier .font(.custom(...)).
Text("Hello, iOS Developer")
    .font(.custom("Montserrat-Bold", size: 24))
However, this approach has a serious problem: it does not respect accessibility. If the user increases the font size in iOS settings, your text will remain fixed at 24pt.
Step 4: Professional Architecture and Accessibility (Dynamic Type)
To develop quality applications, we must support Dynamic Type. Since iOS 14, SwiftUI allows us to link a custom font to a relative text style (like .body, .headline, etc.).
Let’s create a robust and safe extension of Font. Forget “magic strings” scattered throughout your code.
import SwiftUI

// 1. We define an Enum to avoid typos
enum AppFont: String {
    case regular = "Montserrat-Regular"
    case bold = "Montserrat-Bold"
    case light = "Montserrat-Light"
    case italic = "Montserrat-Italic"
}

// 2. We extend Font for semantic usage
extension Font {
    static func appFont(_ font: AppFont, size: CGFloat) -> Font {
        // This is the key for accessibility: relativeTo
        return .custom(font.rawValue, size: size, relativeTo: .body)
    }

    // Overload to link to specific Apple styles
    static func appFont(_ font: AppFont, style: Font.TextStyle) -> Font {
        // Basic mapping of default sizes
        let size: CGFloat
        switch style {
            case .largeTitle: size = 34
            case .title: size = 28
            case .headline: size = 17
            case .caption: size = 12
            default: size = 17
        }
        return .custom(font.rawValue, size: size, relativeTo: style)
    }
}
With this structure, our View code is clean, safe, and accessible:
struct WelcomeView: View {
    var body: some View {
        VStack {
            Text("Welcome to SwiftUI")
                .font(.appFont(.bold, style: .largeTitle)) // Scales like a title

            Text("Learn to manage typography like an expert.")
                .font(.appFont(.regular, size: 16)) // Scales relative to body
                .foregroundColor(.gray)
        }
    }
}
Step 5: Font Management on macOS and watchOS
The code above is perfectly compatible with multiplatform Swift programming, but there are nuances in Xcode you should know.
macOS
On macOS, the Info.plist process is identical if you use SwiftUI (App Life Cycle). However, if you are building an AppKit-based or hybrid app, ensure font files are copied into the resource bundle. Sometimes, macOS requires a simulator restart to recognize dynamically registered fonts.
watchOS
On the Apple Watch, space is golden. Avoid including full typeface families (Bold, Semibold, Medium, Regular, Light, Thin…). Include only the .ttf files you actually use. Remember to check the “Watch App” target in the file inspector of the font, not just the extension target.
Common Troubleshooting
Even senior developers find that the font doesn’t load and the system reverts to San Francisco by default. Here is a debugging checklist:
- Incorrect Name: Are you using the filename instead of the PostScript name? (Review Step 2).
- Target Membership: Select the font file in the Xcode navigator and look at the right panel. Is your App’s checkmark checked?
- Typos in Info.plist: The filename in
Fonts provided by applicationmust be exact, including capitalization and extension. - Simulator Cache: Sometimes, the iOS simulator gets “stuck.” Wipe it (Device -> Erase All Content and Settings) or try on a physical device.
Conclusion
Mastering the use of custom fonts in SwiftUI and Xcode elevates the visual quality of your applications immediately. You no longer depend on Apple’s generic aesthetic; you have total control over the brand.
Always remember to prioritize accessibility. Using beautiful fonts is useless if your visually impaired users cannot scale the text. With the extension architecture and relativeTo we’ve seen today, you have a solid foundation for any professional project in the Apple ecosystem.
If you have any questions about this article, please contact me and I will be happy to help you 🙂. You can contact me on my X profile or on my Instagram profile.