


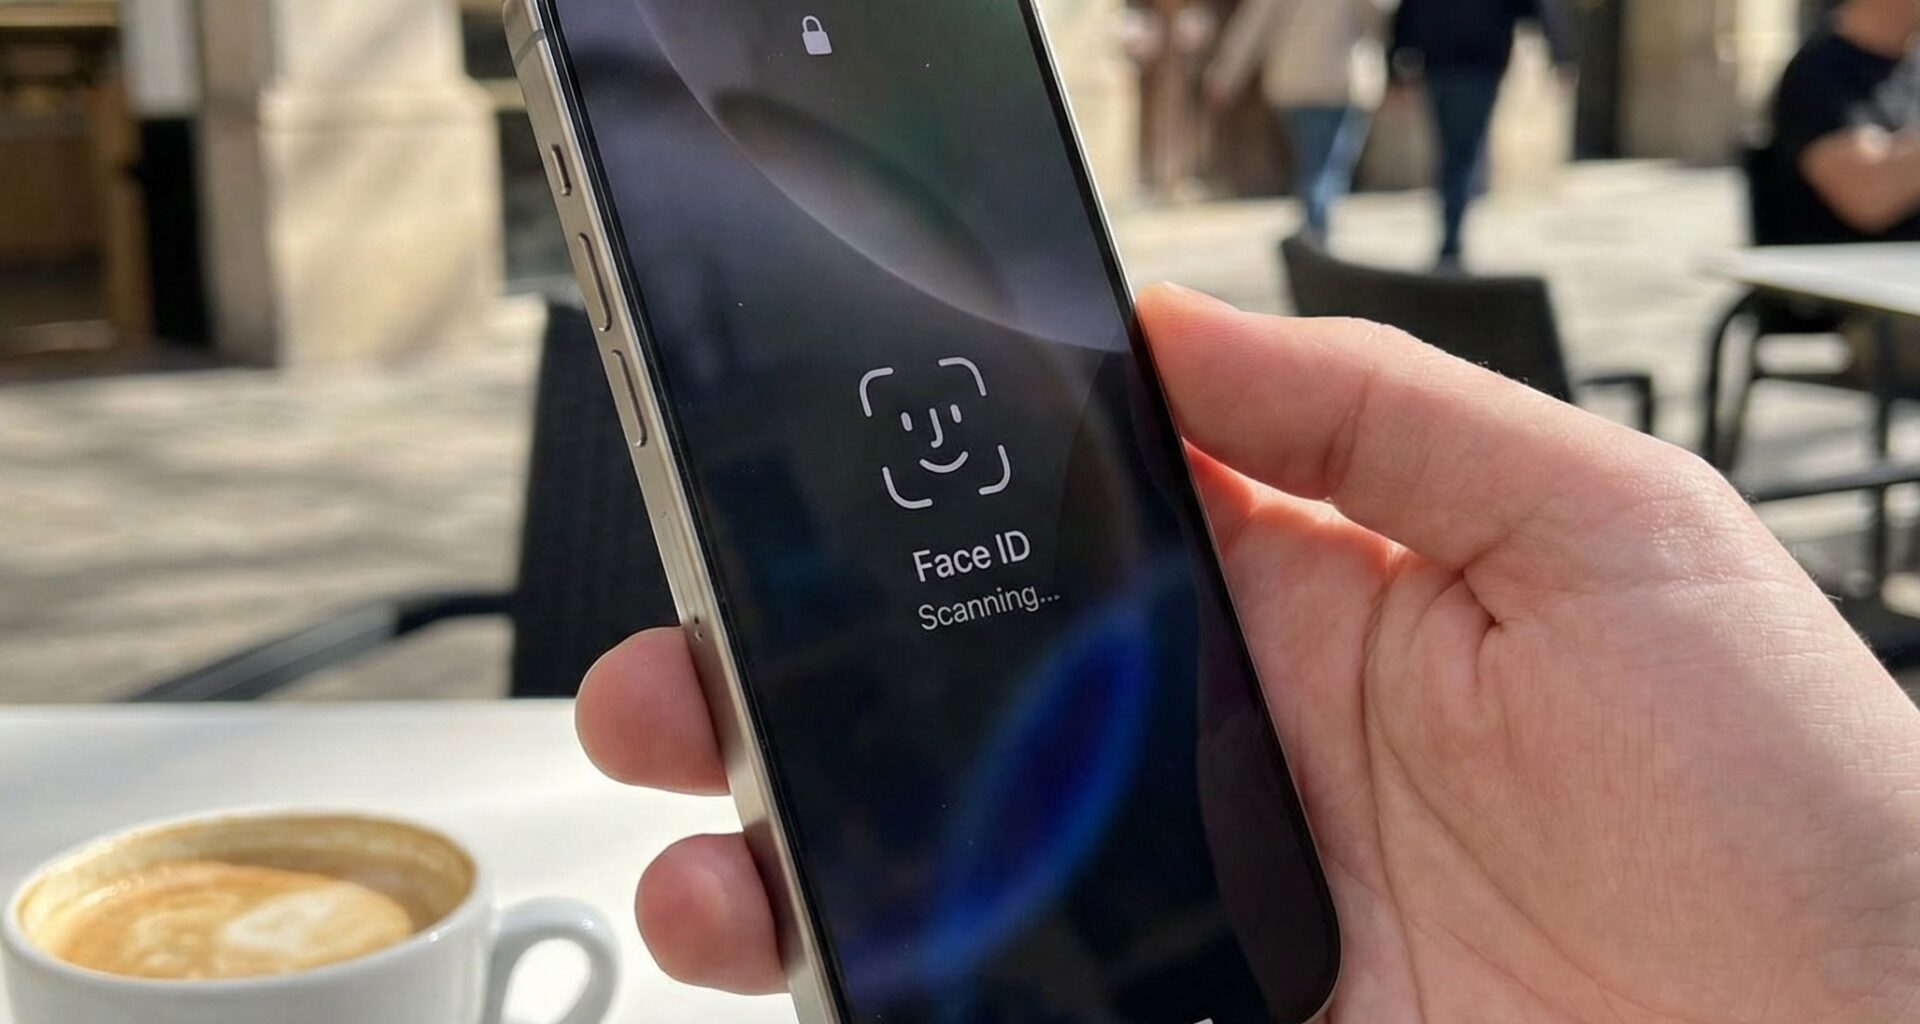
We are going to tackle one of the most demanded elements by modern users: biometric authentication. Specifically, we are going to learn in depth how to implement Face ID in SwiftUI (and by extension, Touch ID). Gone are the days when we forced our users to type long and complex passwords every time they opened our app. In current Swift programming, biometrics is the gold standard for user experience (UX) and security.
In this article, we will discover how to use the LocalAuthentication framework to integrate this technology. In addition, we will create code in Swift fully prepared to work natively on iOS, macOS, and iPadOS using Xcode.
1. The LocalAuthentication Framework
In the Apple ecosystem, we do not interact directly with the infrared camera sensors of Face ID or the fingerprint scanner of Touch ID. For extreme security reasons, that information is guarded in the processor’s Secure Enclave.
For our app to ask “Is this the owner of the device?”, Apple provides us with the LocalAuthentication framework.
The workflow in Swift programming with this framework is simple but strict:
- We create an authentication context (
LAContext). - We verify if the device can perform biometric authentication (Does it have the hardware? Is it configured?).
- We request the policy evaluation (the moment the Face ID animation appears on the screen).
- We act based on the result (success or error).
2. Step 0: Permissions in Xcode (The Info.plist file)
Before writing a single logical line of SwiftUI, there is a critical step that many developers forget, resulting in an immediate application crash. To use Face ID in SwiftUI, the user must know why you are using it.
- Select your project in Xcode.
- Go to the Info tab of your Target.
- Add a new property named
Privacy - Face ID Usage Description(its internal key isNSFaceIDUsageDescription). - In the value field (String), write a clear justification. For example: “We use Face ID to unlock your secret notes quickly and securely.”
Note for the iOS Developer: Touch ID does not require a key in the Info.plist, but given that nowadays most iPhones use Face ID, this key is absolutely mandatory.
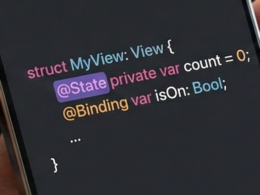
3. Logic Architecture: The BiometricManager
To keep our code clean and respect the MVVM (Model-View-ViewModel) pattern that plays so well with SwiftUI, we are going to encapsulate all the LocalAuthentication logic in a dedicated class.
We will create an observable class using modern Swift concurrency (async/await), which makes the code infinitely more readable than the old completion handlers.
Create a new Swift file named BiometricManager.swift.
import Foundation
import LocalAuthentication

// We use @MainActor to ensure that all state changes
// affecting the UI in SwiftUI occur on the main thread.
@MainActor
class BiometricManager: ObservableObject {

    // States that our SwiftUI view will observe
    @Published var isUnlocked: Bool = false
    @Published var errorMessage: String? = nil

    // Main authentication method
    func authenticate() async {
        let context = LAContext()
        var error: NSError?

        // 1. We define the policy: We want to use biometrics
        let policy: LAPolicy = .deviceOwnerAuthenticationWithBiometrics

        // The message that will appear on Touch ID (Face ID uses the Info.plist one)
        let reason = "Please identify yourself to access your secure data."

        // 2. We verify if the hardware is available and configured
        if context.canEvaluatePolicy(policy, error: &error) {
            do {
                // 3. We request authentication from the system asynchronously
                let success = try await context.evaluatePolicy(policy, localizedReason: reason)

                // If we get here without throwing an error, we analyze the boolean
                if success {
                    self.isUnlocked = true
                    self.errorMessage = nil
                } else {
                    self.errorMessage = "Could not verify your identity."
                }

            } catch {
                // 4. We handle the errors that the user or system might generate
                self.errorMessage = evaluateError(error)
            }
        } else {
            // There is no Face ID / Touch ID, or it is not configured
            self.errorMessage = "Your device does not support biometric authentication or it is not configured."

            // You could implement a "Fallback" to manual password here
        }
    }

    // Method to lock the app again
    func lock() {
        self.isUnlocked = false
    }

    // Helper to translate LAError errors to friendly messages
    private func evaluateError(_ error: Error) -> String {
        guard let laError = error as? LAError else {
            return "An unexpected error occurred."
        }

        switch laError.code {
        case .authenticationFailed:
            return "Identity not verified."
        case .userCancel:
            return "Authentication canceled by user."
        case .userFallback:
            return "The user chose to use a password."
        case .biometryNotAvailable:
            return "Biometrics not available on this device."
        case .biometryNotEnrolled:
            return "No faces or fingerprints are registered on the device."
        case .biometryLockout:
            return "Too many failed attempts. Biometrics locked."
        default:
            return "Biometric error: \(laError.localizedDescription)"
        }
    }
}
What makes this code excellent?
As an expert iOS Developer, you must handle all edge cases. Our evaluateError function translates the obscure LAError codes into messages that the end user can understand. If the user fails Face ID 5 times, the system throws a .biometryLockout. Our app will know exactly how to tell them what happened instead of just failing silently.
4. Building the Interface: Face ID in SwiftUI
Now that we have our brain (BiometricManager), let’s connect it to a graphical interface using the declarative power of SwiftUI.
We want a view that shows a lock screen with a button. When the user successfully authenticates, we will reveal the secret content.
Open your ContentView.swift and modify it as follows:
import SwiftUI

struct ContentView: View {
    // We instantiate our manager
    @StateObject private var biometricManager = BiometricManager()

    var body: some View {
        ZStack {
            // Dynamic background depending on the state
            (biometricManager.isUnlocked ? Color.green : Color.blue)
                .opacity(0.1)
                .ignoresSafeArea()

            VStack(spacing: 30) {
                if biometricManager.isUnlocked {
                    // --- UNLOCKED VIEW ---
                    UnlockedContentView(biometricManager: biometricManager)
                } else {
                    // --- LOCKED VIEW ---
                    LockedContentView(biometricManager: biometricManager)
                }
            }
            .padding()
            .animation(.spring(), value: biometricManager.isUnlocked)
        }
    }
}

// Sub-view for protected content
struct UnlockedContentView: View {
    @ObservedObject var biometricManager: BiometricManager

    var body: some View {
        VStack(spacing: 20) {
            Image(systemName: "lock.open.fill")
                .font(.system(size: 80))
                .foregroundColor(.green)

            Text("Access Granted!")
                .font(.largeTitle)
                .bold()

            Text("Here are your bank details and top secret state data.")
                .multilineTextAlignment(.center)
                .padding()

            Spacer()

            Button(action: {
                biometricManager.lock()
            }) {
                Text("Log Out")
                    .bold()
                    .frame(maxWidth: .infinity)
                    .padding()
                    .background(Color.red)
                    .foregroundColor(.white)
                    .cornerRadius(12)
            }
        }
    }
}

// Sub-view for the login screen
struct LockedContentView: View {
    @ObservedObject var biometricManager: BiometricManager

    var body: some View {
        VStack(spacing: 20) {
            Image(systemName: "faceid")
                .font(.system(size: 100))
                .foregroundColor(.blue)

            Text("Secure App")
                .font(.largeTitle)
                .bold()

            Text("Your data is protected. Identify yourself to continue.")
                .multilineTextAlignment(.center)
                .foregroundColor(.secondary)

            // Show error if there is one
            if let error = biometricManager.errorMessage {
                Text(error)
                    .foregroundColor(.red)
                    .font(.footnote)
                    .multilineTextAlignment(.center)
                    .padding(.top, 10)
            }

            Spacer()

            Button(action: {
                // We execute the asynchronous task using Task
                Task {
                    await biometricManager.authenticate()
                }
            }) {
                HStack {
                    Image(systemName: "lock.fill")
                    Text("Unlock with Face ID")
                        .bold()
                }
                .frame(maxWidth: .infinity)
                .padding()
                .background(Color.blue)
                .foregroundColor(.white)
                .cornerRadius(12)
            }
        }
    }
}
Notes on SwiftUI:
By separating the view into UnlockedContentView and LockedContentView, we keep our main code clean. Also, notice how we use Task { } inside the unlock button. Since our authenticate() method in Swift programming requires await, we must wrap it in an asynchronous context so that SwiftUI can call it from the synchronous button action.
5. Cross-Platform Power: iOS, iPadOS, and macOS
One of Apple’s great promises with SwiftUI is “Learn once, apply anywhere”. The code we just wrote in Xcode is a brilliant testament to this.
Although the title of the article explicitly mentions Face ID in SwiftUI, the LocalAuthentication framework is smart enough to abstract the underlying hardware.
What does this mean for you as an iOS Developer?
- On an iPhone 15 Pro or iPad Pro: The code will automatically invoke the TrueDepth sensors and display the Face ID glyph.
- On an iPad Air, iPad mini, or iPhone SE: The same code will wait for the user to place their finger on the power/home button, activating Touch ID.
- On a MacBook Pro / Air (macOS): When compiling this same Swift code for Mac, the system will automatically ask for the user’s fingerprint via the keyboard, showing the standard macOS security dialog.
If you want your user interface to show the correct icon (faceid vs touchid), you can interrogate the context after calling canEvaluatePolicy:
// Code snippet to detect biometrics type
let context = LAContext()
if context.canEvaluatePolicy(.deviceOwnerAuthenticationWithBiometrics, error: nil) {
    if context.biometryType == .faceID {
        print("The device uses Face ID")
    } else if context.biometryType == .touchID {
        print("The device uses Touch ID")
    } else if context.biometryType == .opticID {
        print("The device uses Optic ID (Vision Pro)")
    }
}
Pro Tip: Use this to dynamically change icons and images in your SwiftUI views to match the actual hardware of your user’s device.
6. Alternatives (Fallback) to Biometrics
In the real world, users might wear masks (although Face ID has improved with that), have wet fingers, or simply fail biometric attempts.
By default, the .deviceOwnerAuthenticationWithBiometrics policy will show a “Use Password” button if Face ID fails a couple of times. However, that password button (whose error is .userFallback) delegates to you (the developer) the task of showing a text field in SwiftUI to ask for your app’s custom password.
If what you want is that, if Face ID fails, the device simply asks for the iPhone/Mac unlock PIN (the 4 to 6 digit code), you must change the policy:
// Instead of:
// let policy: LAPolicy = .deviceOwnerAuthenticationWithBiometrics

// Use this policy:
let policy: LAPolicy = .deviceOwnerAuthentication
By using .deviceOwnerAuthentication, the system will try Face ID first. If it fails, or if it is not configured, it will automatically show the system’s numeric keypad (the iPhone PIN) without you having to program a single extra line of code. It is a massive win in usability!
7. Security Warning: Face ID vs. Keychain
As a good iOS Developer, you must know the architectural limitations of what we just built.
The LocalAuthentication framework we used returns a boolean (true or false). Basically, you are asking iOS: “Is this the user?”, and iOS replies “Yes”.
For 90% of applications (personal diaries, hiding photos, protecting a chat), this is more than enough. However, if you are developing a banking application, a cryptocurrency wallet, or handling critical health data, this boolean can be compromised on jailbroken devices.
If you need military-grade security, you must combine Face ID with Apple’s Keychain. In that scenario, you don’t just ask if the user is valid, but you configure an Access Control List (ACL) in the Keychain that tells the operating system: “Do not decrypt this API access token unless the user’s face passes hardware validation”. This way, even if a hacker bypasses the boolean in memory, they will not get the token because the encryption key never leaves the Secure Enclave without successful biometrics.
That is an advanced topic for another Swift programming tutorial, but it is vital that you know the difference!
Conclusion
Integrating Face ID in SwiftUI using Xcode is one of the biggest quality of life improvements you can add to your applications. It transforms a tedious login process into a magical, frictionless half-second experience.
Throughout this tutorial, we have explored how to configure privacy permissions, build a robust asynchronous manager in Swift, and connect it to a beautiful reactive interface capable of running natively on iOS, iPadOS, and macOS.
Your job as an iOS Developer is to make complex technology feel invisible and effortless for the user, and biometrics is exactly that.
If you have any questions about this article, please contact me and I will be happy to help you  . You can contact me on my X profile or on my Instagram profile.