

If you are an iOS Developer navigating the modern landscape of Apple platforms, you already know that SwiftUI has fundamentally changed how we build user interfaces. The declarative nature of Swift programming allows us to construct complex, animated, and responsive layouts with just a fraction of the code required in UIKit or AppKit. However, with this convenience comes the challenge of taming default behaviors—one of the most infamous being the “rubber band” or bounce effect of a ScrollView.
In this comprehensive tutorial we will dive deep into how to disable ScrollView Bounce in SwiftUI. Whether you are targeting iOS, macOS, or watchOS, we will explore the native API introduced in recent SDKs, legacy fallbacks for older OS versions, and architectural alternatives that make your apps feel more polished and professional. Fire up Xcode, and let’s get started.
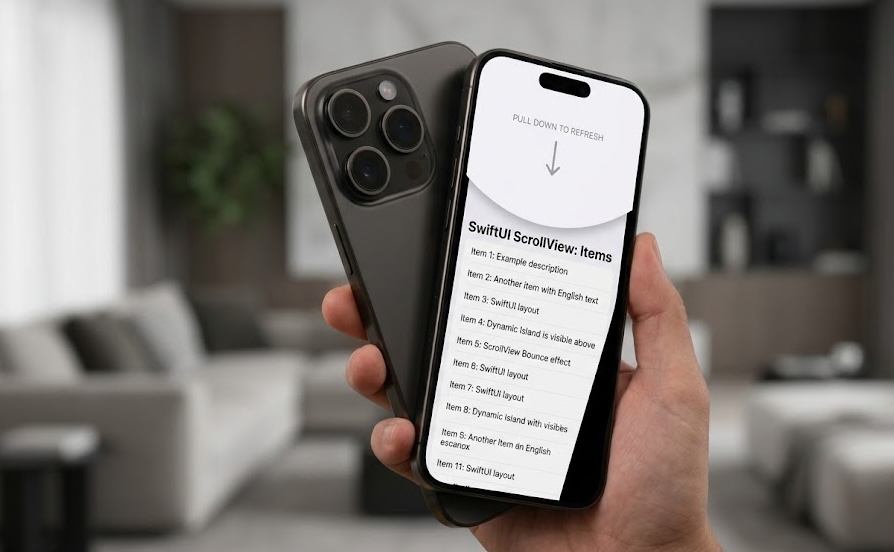
The UX of the “Rubber Band” Effect
Before we remove a feature, it is crucial to understand why Apple includes it. The scroll bounce (often referred to as the “rubber band” effect) is deeply ingrained in Apple’s human interface guidelines. It provides tactile feedback, letting the user know they have reached the physical boundary of a list or page.
However, there are many scenarios where an iOS Developer needs a rigid, non-bouncing view:
- Dashboards: When building a fixed-size analytics dashboard that occasionally needs scrolling on smaller devices but should remain completely static on a Pro Max iPhone.
- Forms and Login Screens: Standard forms shouldn’t bounce if the keyboard is not active or if the content perfectly fits the screen.
- Paging Views: Custom carousels where the over-scroll effect breaks the immersion of your custom animations.
Thankfully, Apple listened to developer feedback. With the evolution of SwiftUI, we now have robust, native ways to handle this inside Xcode.
Method 1: The Native Modern Approach (iOS 16.4+)
For years, developers begged for a native SwiftUI modifier to control scroll bounce. With the release of iOS 16.4, macOS 13.3, and watchOS 9.4, Apple introduced the .scrollBounceBehavior modifier. This is now the definitive, best-practice way to disable ScrollView bounce in SwiftUI when the content doesn’t exceed the screen size.
The scrollBounceBehavior modifier takes a ScrollBounceBehavior enum, which offers three main values:
.automatic: The default behavior. Bounces based on the platform’s standard conventions..always: Forces the bounce effect, even if the content is tiny..basedOnSize: The magic bullet. It only allows bouncing if the content actually exceeds the bounds of theScrollView.
Implementation in Swift
Here is how you can implement this in your Swift programming workflow:
import SwiftUI

struct DashboardView: View {
    var body: some View {
        ScrollView {
            VStack(spacing: 20) {
                Image(systemName: "chart.pie.fill")
                    .resizable()
                    .frame(width: 100, height: 100)
                    .foregroundColor(.blue)

                Text("Quarterly Analytics")
                    .font(.largeTitle)
                    .fontWeight(.bold)

                Text("When viewed on a large screen, this content fits perfectly. Because of our modifier, it will remain rigid and won't bounce. On a smaller device like an iPhone SE, it will gracefully become a scrollable, bouncing view.")
                    .multilineTextAlignment(.center)
                    .padding()
            }
            .padding()
        }
        // The magic line:
        .scrollBounceBehavior(.basedOnSize, axes: .vertical)
    }
}
Why this is the best approach
This single modifier evaluates the geometry of your content against the geometry of the device’s screen. If you are developing cross-platform apps in Xcode and SwiftUI, this modifier works seamlessly. On a Mac, it prevents trackpad over-scroll; on an Apple Watch, it stops the Digital Crown from pulling the view out of bounds.
Method 2: The UIKit Bridge (For iOS 16.3 and Below)
If you are supporting older operating systems, the .scrollBounceBehavior modifier won’t compile without availability checks. To completely disable ScrollView bounce in SwiftUI on older iOS versions, we must dip our toes into UIKit.
Under the hood, a SwiftUI ScrollView on iOS is backed by a UIScrollView. By mutating the global appearance of UIScrollView, we can force it to stop bouncing.
import SwiftUI

struct LegacyNoBounceView: View {

    init() {
        // Globally disables bounce for all scroll views in the app
        UIScrollView.appearance().bounces = false
    }

    var body: some View {
        ScrollView {
            VStack(spacing: 20) {
                Text("Legacy iOS Support")
                    .font(.title)

                Text("This scroll view will never bounce, regardless of content size, because we disabled it via UIKit appearance proxies.")
                    .padding()
            }
            .frame(maxWidth: .infinity)
        }
    }
}
The Catch with Appearance Proxies
Using UIScrollView.appearance().bounces = false acts as a global override. It will disable the bounce for every ScrollView and List in your app. To localize this, you can toggle the appearance on and off during the view lifecycle:
ScrollView {
    Text("My rigid content")
}
.onAppear {
    UIScrollView.appearance().bounces = false
}
.onDisappear {
    UIScrollView.appearance().bounces = true
}
Note: This UIKit workaround only applies to iOS and iPadOS. It will not compile for macOS or watchOS without wrapping it in #if os(iOS) compiler directives.
Method 3: The ViewThatFits Architecture
Sometimes, you don’t actually want to disable the bounce—you want to completely remove the ScrollView when the content fits, but add a ScrollView when the content overflows.
Introduced in iOS 16, ViewThatFits is a powerful layout container that evaluates its children and chooses the first one that fits within the available space. This is an incredibly elegant, purely SwiftUI way to handle small vs. large content without hacking scroll behaviors.
import SwiftUI

struct AdaptiveContentView: View {
    var textContent: String = "Imagine a lot of text here..."

    var body: some View {
        ViewThatFits(in: .vertical) {
            // First choice: Try to render without a ScrollView
            ContentView(text: textContent)

            // Fallback: If it's too tall, wrap it in a ScrollView
            ScrollView {
                ContentView(text: textContent)
            }
        }
    }
}

struct ContentView: View {
    let text: String
    var body: some View {
        VStack {
            Image(systemName: "globe")
                .imageScale(.large)
                .foregroundColor(.accentColor)
            Text(text)
                .padding()
        }
    }
}
By leveraging ViewThatFits, the system mathematically determines if your layout needs a scroll view. If it fits natively, it’s just a standard VStack (which inherently cannot bounce). If it overflows, it becomes a ScrollView.
Method 4: Total Control with SwiftUI-Introspect
What if you are targeting iOS 16.4+, but you want to completely disable the bounce even if the content is larger than the screen? The .scrollBounceBehavior native modifier does not have a .never option—it only has .automatic, .always, and .basedOnSize.
To forcefully stop a ScrollView from bouncing while retaining scrolling capabilities natively, advanced iOS Developers turn to SwiftUI-Introspect. This open-source library allows you to access the underlying UIKit (UIScrollView) or AppKit (NSScrollView) elements safely without global appearance proxies.
How to use Introspect in Xcode:
- Add the Package Dependency: Open your project in Xcode. Navigate to File > Add Packages… and paste the SwiftUI-Introspect repository URL (
https://github.com/siteline/swiftui-introspect). - Import the Library: At the top of your Swift file, add
import SwiftUIIntrospect. - Apply the Modifier: Attach the
.introspect(.scrollView, on: ...)modifier directly to yourScrollView.
The Introspect Implementation
import SwiftUI
import SwiftUIIntrospect

struct IntrospectedScrollView: View {
    var body: some View {
        ScrollView {
            ForEach(0..<50) { index in
                Text("Row \(index)")
                    .frame(maxWidth: .infinity)
                    .padding()
                    .background(Color.gray.opacity(0.2))
                    .cornerRadius(8)
                    .padding(.horizontal)
            }
        }
        // Access the underlying UIScrollView safely:
        .introspect(.scrollView, on: .iOS(.v16, .v17, .v18)) { scrollView in
            scrollView.bounces = false // Completely disables bounce
            scrollView.showsVerticalScrollIndicator = false
        }
    }
}
This method is highly favored in complex enterprise apps because it gives you granular, view-level control over the UIScrollView without polluting the global UIScrollView.appearance().
Cross-Platform Considerations
When engaging in Swift programming across the entire Apple ecosystem, handling scroll physics requires an understanding of how each platform expects to behave.
| Platform | Default Scrolling Input | Native Bounce Disable Method |
|---|---|---|
| iOS / iPadOS | Touch (Pan Gesture) | .scrollBounceBehavior(.basedOnSize) |
| macOS | Trackpad / Magic Mouse | .scrollBounceBehavior(.basedOnSize) |
| watchOS | Digital Crown / Touch | .scrollBounceBehavior(.basedOnSize) |
Notice the pattern? Since SwiftUI unified these APIs, .scrollBounceBehavior works flawlessly across all three. For macOS developers, this replaces the need to dig into NSScrollView and manipulate the hasHorizontalBounces or hasVerticalBounces properties. For watchOS developers, it stops the Digital Crown from pulling UI elements away from the edges of the tiny screen, preserving a tight, contained UI layout.
Summary and Best Practices
To summarize, knowing how to disable ScrollView Bounce in SwiftUI separates a beginner from a seasoned iOS Developer. The tools you choose depend entirely on your minimum deployment target and the exact user experience you are trying to craft.
- Use
.scrollBounceBehavior(.basedOnSize)as your default choice for modern apps. It honors Apple’s design language by keeping the bounce for long content, but removing it for short content. - Use
ViewThatFitsif you want to conditionally swap between a static view and a scrolling view entirely. - Use
UIScrollView.appearance()if you must support iOS 15 or below, but remember to scope it using.onAppearto avoid global side effects. - Use SwiftUI-Introspect if you need a
.neverbounce behavior (disabling it entirely even on long lists) without resorting to global hacks.