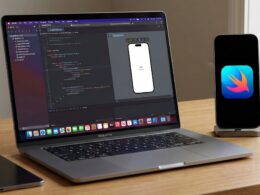


In the world of software development, there is an almost mythical state of mind known as “Flow” or “The Zone”. However, in the modern era of Swift programming, an evolution of this concept has emerged: Vibe Coding.
If you are an iOS Developer looking not just to write code, but to feel the synchronicity between your mind, the IDE, and the final result, this tutorial is for you. Today we will explore how to set up your environment, utilize native artificial intelligence, and structure a multi-platform architecture (iOS, macOS, watchOS) using SwiftUI and Xcode to reach development nirvana.
What is Vibe Coding in Xcode?
“Vibe Coding” isn’t official Apple terminology, but it is a term that has gained traction in the community. It refers to the intersection between:
- Aesthetics & Environment: A visually pleasing IDE that reduces cognitive fatigue.
- Predictive Assistance: The use of AI (like Xcode 16+’s Predictive Code Completion) so that code is written almost as fast as you think.
- Immediacy: Seeing changes instantly with #Preview and live reload.
- Multi-platform Fluidity: Write once, deploy across the entire ecosystem.
The goal is to stop fighting the tool and start “vibing” with it. When you achieve this, Swift programming ceases to be a technical task and becomes a fluid creative act.
Part 1: The Setup (Setting the Vibe)
Before writing a single line of code, we must prepare the temple. An iOS Developer spends thousands of hours in front of Xcode; aesthetics are not superficial, they are functional.
1. Typography and Ligatures
Vibe Coding requires clarity. The default font (SF Mono) is excellent, but to get into “the zone,” many developers opt for fonts with code ligatures (where != becomes a single inequality symbol).
- Recommendation: JetBrains Mono or Fira Code.
- Configuration: Go to
Xcode > Settings > Themesand adjust the font.
2. The Theme
Contrast is key. Dark themes are preferred for long sessions.
- Popular Themes: Catppuccin, Dracula, or the classic Xcode “Dark” with modifications to highlight SwiftUI modifiers.
3. Interface Cleanup
Hide what you don’t use. Use Cmd + 0 to hide the Navigator and Cmd + Opt + 0 to hide the Inspector when coding logic. Vibe Coding is about focus.
Part 2: The Engine Power (Swift 6 and Xcode AI)
Modern Vibe Coding in Xcode relies heavily on Apple Silicon capabilities.
Predictive Code Completion
Make sure you have predictive code completion enabled. This feature, recently introduced, uses a local machine learning model (on your Mac) to predict not just the next word, but entire blocks of code based on the context of your Swift programming.
Pro Note: The AI learns from your variable names and structure. If you use descriptive names like
fetchUserData()instead ofgetData(), the prediction will be much more accurate, maintaining the “vibe” without interruptions.
Part 3: Practical Tutorial – The “ZenFocus” App
To understand Vibe Coding, we are going to create a real application. We will build “ZenFocus,” a focus timer app that shares logic between iOS, macOS, and watchOS. We will use the latest in Swift and SwiftUI: The @Observable Macro and modern navigation.
Step 1: Project Configuration
- Create a new project in Xcode.
- Select “Multiplatform” > “App”.
- Name:
ZenFocus. - Ensure that “Includes” has iOS, macOS, and watchOS selected.
Step 2: The Heart (Shared Logic)
True Vibe Coding avoids repetition. We will create a shared ViewModel that works across all three operating systems. We will use the Swift 5.9+ @Observable macro, which removes the need for @Published and reduces visual “noise.” Create a file named FocusEngine.swift:
<pre class="wp-block-syntaxhighlighter-code">import SwiftUI
import Observation
// The "Brain" of our app.
// @Observable allows SwiftUI to react to changes without boilerplate.
@Observable
class FocusEngine {
    var isRunning: Bool = false
    var progress: Double = 0.0
    var duration: TimeInterval = 1500 // 25 minutes

    private var timer: Timer?

    // Clear and descriptive actions
    func toggleTimer() {
        if isRunning {
            stop()
        } else {
            start()
        }
    }

    private func start() {
        isRunning = true
        // Start a native timer
        timer = Timer.scheduledTimer(withTimeInterval: 0.1, repeats: true) { [weak self] _ in
            guard let self = self else { return }
            if self.progress < 1.0 {
                self.progress += 0.1 / self.duration
            } else {
                self.stop()
                self.progress = 0
            }
        }
    }

    private func stop() {
        isRunning = false
        timer?.invalidate()
        timer = nil
    }
}</pre>
This class is pure logic. It doesn’t matter if it’s on a watch or a Mac Pro, it works the same.
Step 3: Vibe Coding on iOS (Handheld Experience)
On iOS, the “vibe” needs to be tactile and responsive. We will use gradients and sensoryFeedback to provide haptic response. Open ContentView.swift (or create iOSFocusView.swift):
import SwiftUI

struct iOSFocusView: View {
    @State private var engine = FocusEngine()

    var body: some View {
        ZStack {
            // Atmospheric background
            LinearGradient(colors: [Color.indigo, Color.purple.opacity(0.8)],
                           startPoint: .topLeading,
                           endPoint: .bottomTrailing)
                .ignoresSafeArea()

            VStack(spacing: 40) {
                Text("Zen Mode")
                    .font(.system(size: 34, weight: .bold, design: .rounded))
                    .foregroundStyle(.white)
                    .padding(.top, 50)

                // Progress Circle
                ZStack {
                    Circle()
                        .stroke(.white.opacity(0.2), lineWidth: 20)

                    Circle()
                        .trim(from: 0, to: engine.progress)
                        .stroke(.white, style: StrokeStyle(lineWidth: 20, lineCap: .round))
                        .rotationEffect(.degrees(-90))
                        .animation(.linear(duration: 0.1), value: engine.progress)
                }
                .frame(width: 250, height: 250)
                .shadow(radius: 10)

                // Button with "Vibe"
                Button {
                    withAnimation(.spring(response: 0.4, dampingFraction: 0.6)) {
                        engine.toggleTimer()
                    }
                } label: {
                    Image(systemName: engine.isRunning ? "pause.fill" : "play.fill")
                        .font(.system(size: 40))
                        .foregroundStyle(.indigo)
                        .padding(30)
                        .background(.white)
                        .clipShape(Circle())
                        .shadow(color: .black.opacity(0.2), radius: 10, x: 0, y: 10)
                }
                // Crucial haptic feedback for user experience
                .sensoryFeedback(.impact(weight: .heavy), trigger: engine.isRunning)
            }
        }
    }
}

#Preview {
    iOSFocusView()
}
Vibe Analysis:
.animationand.spring: Animations are not decorations; they are context. In Vibe Coding, every state change must have a visual transition..sensoryFeedback: Connects the software with the hardware.
Step 4: Vibe Coding on macOS (Desktop Experience)
For macOS, the paradigm changes. We want the app to feel native, floating, and respectful of the desktop. We will use translucent materials (Glass Background). Create MacFocusView.swift:
import SwiftUI

struct MacFocusView: View {
    @State private var engine = FocusEngine()

    var body: some View {
        HStack {
            // Visual Sidebar
            VStack(alignment: .leading) {
                Label("Focus", systemImage: "brain.head.profile")
                Label("Stats", systemImage: "chart.bar")
                Spacer()
            }
            .padding()
            .frame(width: 150)
            .background(.ultraThinMaterial) // Native glass effect

            // Main Area
            VStack {
                Text(String(format: "%.0f%%", engine.progress * 100))
                    .font(.system(size: 80, weight: .thin))
                    .contentTransition(.numericText(value: engine.progress)) // Smooth numeric transition

                Button(engine.isRunning ? "Stop" : "Focus") {
                    engine.toggleTimer()
                }
                .buttonStyle(.borderedProminent)
                .controlSize(.large)
            }
            .frame(maxWidth: .infinity, maxHeight: .infinity)
        }
        .frame(width: 500, height: 300)
        .background(Color(nsColor: .windowBackgroundColor))
    }
}

#Preview {
    MacFocusView()
}
Step 5: Vibe Coding on watchOS (Glanceable Experience)
On the watch, information must be immediate. Less is more. Create WatchFocusView.swift:
import SwiftUI

struct WatchFocusView: View {
    @State private var engine = FocusEngine()

    var body: some View {
        VStack {
            if engine.isRunning {
                ProgressView(value: engine.progress) {
                    Text("Focusing...")
                        .font(.caption)
                }
                .progressViewStyle(.circular)
                .tint(.orange)
            } else {
                Text("Ready?")
                    .font(.title3)
                    .foregroundStyle(.secondary)
            }

            Spacer()

            Button {
                engine.toggleTimer()
            } label: {
                Image(systemName: engine.isRunning ? "stop.fill" : "play.fill")
            }
            .buttonStyle(.borderedProminent)
            .tint(engine.isRunning ? .red : .green)
        }
        .padding()
        // The colored border indicates status instantly
        .containerBackground(engine.isRunning ? Color.orange.gradient : Color.black.gradient, for: .navigation)
    }
}
Part 4: Optimizing Flow with Macros and Previews
To keep the “Vibe Coding” real, you must reduce friction. Here are three advanced techniques for any iOS Developer:
1. Previews with Mock Data
Don’t waste time running the full simulator. Create an extension for your models.
extension FocusEngine {
    static var mock: FocusEngine {
        let engine = FocusEngine()
        engine.progress = 0.45
        engine.isRunning = true
        return engine
    }
}

// Usage in #Preview
#Preview {
    iOSFocusView()
        .environment(FocusEngine.mock) // Inject pre-configured state
}
2. Semantic Organization
Vibe Coding hates clutter. Organize your files in Xcode not by type (Views, Models), but by functionality (Features). This prevents you from jumping between distant folders in the file tree.
3. Essential Keyboard Shortcuts
Don’t use the mouse if you don’t have to.
Cmd + Shift + O: Open any file quickly.Ctrl + I: Re-indent code (fixes format instantly).Cmd + Option + P: Refresh the SwiftUI Canvas.Cmd + Shift + L: Open the library of modifiers and snippets.
Part 5: Why SwiftUI is the King of Vibe Coding
As an iOS Developer, you might come from UIKit. UIKit is powerful, but it is imperative. You have to tell the system how to do things step by step. SwiftUI is declarative. You say what you want.
- UIKit: “Create a button, place it at x:50 y:50, make it red, add a target, if pressed animate this…”
- SwiftUI: “I want a red button here. If state changes, animate it.”
This difference is fundamental for Vibe Coding. You write less code, read less code, and visual errors are easier to spot.
Conclusion: Your New Standard
Vibe Coding in Xcode isn’t just about having a pretty editor. It’s about mastering modern tools (SwiftUI, Macros, Predictive AI) to eliminate friction between your idea and execution.
Summary for the Modern iOS Developer:
- Configure your Xcode for visual comfort.
- Trust in Predictive Code Completion.
- Use SwiftUI and
@Observablefor a clean architecture. - Design with “feel” in mind (animations, haptics) as much as function.
If you have any questions about this article, please contact me and I will be happy to help you 🙂. You can contact me on my X profile or on my Instagram profile.