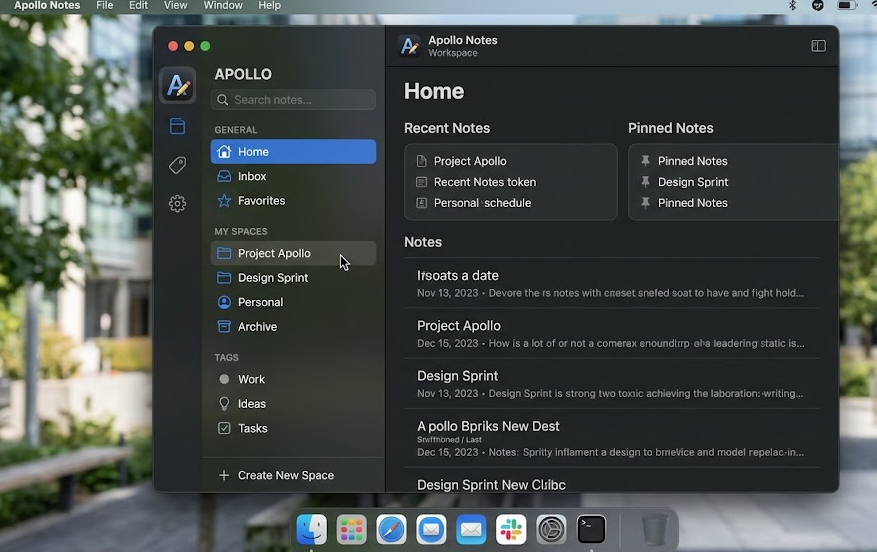

As an iOS Developer, you likely already master creating interfaces for mobile screens, managing tab bars, navigation stacks, and fluid transitions. However, when you decide to make the leap to desktop development, you encounter new paradigms. One of the most iconic and fundamental interface elements in Apple’s desktop ecosystem is the sidebar. In this article, we will thoroughly explore how to build a macOS sidebar menu in SwiftUI, taking full advantage of the modern tools Apple offers.
Apple’s ecosystem is more unified than ever. Thanks to Catalyst and the evolution of Apple’s declarative framework, the knowledge you have acquired in building mobile applications is directly transferable to the Mac. Throughout this extensive tutorial, we will break down step by step how to structure, design, and add logic to a robust sidebar menu. Mastering this technique is an essential rite of passage for any developer who wants to create native, efficient, and visually appealing desktop applications using Swift programming.
Prerequisites to Get Started
Before diving into the code, it is vital to ensure that our development environment is ready. To follow this tutorial, you will need the following:
- Xcode: Make sure you have the latest version of Xcode installed (preferably version 15 or higher) from the Mac App Store. It is our main integrated development environment (IDE) and contains all the necessary libraries.
- Basic SwiftUI knowledge: We will assume that you are already familiar with views, modifiers, and the main layout containers (
VStack,HStack,ZStack). - Swift programming basics: Understand how enumerators (
enum), protocols (likeHashableandIdentifiable), and state management (@State,@Binding) work in Swift. - macOS Operating System: Since we are compiling a target for Mac, you will need to be working in a macOS environment.
The Paradigm Shift: Goodbye NavigationView, Hello NavigationSplitView
If you have been working with SwiftUI for a while, you probably remember the classic NavigationView. During the early years of the framework, this was the standard tool for handling navigation across iOS, iPadOS, and macOS. However, starting with macOS 13 (Ventura) and iOS 16, Apple introduced a much more powerful, semantic, and flexible navigation architecture: NavigationSplitView.
For an iOS Developer, this shift is fundamental. NavigationSplitView is specifically designed to handle multi-column interfaces natively. On an iPad or a Mac, this automatically translates to a sidebar on the left and a detail content area on the right (or even three columns if we add an intermediate view). This structure not only simplifies your Swift programming code but also ensures that your application automatically respects expected operating system behaviors, such as sidebar collapsing, window resizing, and the native macOS visual style.
Step 1: Project Setup in Xcode
The first step is to create the canvas we are going to work on.
- Open Xcode and select “Create a new Xcode project”.
- In the template window, navigate to the macOS tab at the top.
- Select App and click Next.
- Name your project, for example,
MacSidebarTutorial. - Ensure the Interface field is set to SwiftUI and the Language to Swift.
- Save the project in your preferred directory.
When the project opens, you will see the classic ContentView.swift file. This will be our starting point, but before building the interface, we need to define what data we are going to display.
Step 2: Defining a Solid Data Model
In Swift programming, a clean architecture starts with a well-defined data model. For our macOS sidebar menu in SwiftUI, we will use an enumerator (enum) to represent the different sections of our application. Enumerators are perfect for this because they are compile-time safe and prevent typos when navigating.
Create a new Swift file named AppSection.swift and add the following code:
import Foundation

enum AppSection: String, CaseIterable, Identifiable {
    case dashboard = "Dashboard"
    case statistics = "Statistics"
    case messages = "Messages"
    case settings = "Settings"

    // Conforming to the Identifiable protocol
    var id: String { self.rawValue }

    // Computed property to assign an icon to each section
    var iconName: String {
        switch self {
        case .dashboard:
            return "square.grid.2x2"
        case .statistics:
            return "chart.bar"
        case .messages:
            return "envelope"
        case .settings:
            return "gearshape"
        }
    }
}
By making our enum conform to CaseIterable, we can easily iterate over all its cases to build the visual list. By conforming to Identifiable, SwiftUI will be able to uniquely distinguish each row in the list, which is a strict requirement for managing selection. Furthermore, we have added a computed property iconName that will return the name of a suitable SF Symbol for each section, providing that polished, native look that Mac users expect.
Step 3: Building the Sidebar Menu
Now that we have our data model, it’s time to build the interface. Go back to your ContentView.swift file. We are going to implement the NavigationSplitView.
The NavigationSplitView component requires, in its most basic form, two closures: one for the sidebar and another for the detail content. Additionally, we need a state variable (@State) to store the section the user has currently selected.
import SwiftUI

struct ContentView: View {
    // State variable to track the current selection.
    // Optional (?) because there might be nothing selected at startup.
    @State private var selectedSection: AppSection? = .dashboard

    var body: some View {
        NavigationSplitView {
            // COLUMN 1: The Sidebar
            List(AppSection.allCases, selection: $selectedSection) { section in
                NavigationLink(value: section) {
                    Label(section.rawValue, systemImage: section.iconName)
                }
            }
            .navigationTitle("My macOS App")
            // We restrict the sidebar width for an optimal layout
            .navigationSplitViewColumnWidth(min: 150, ideal: 200, max: 300)

        } detail: {
            // COLUMN 2: The Detail Content
            DetailView(section: selectedSection)
        }
    }
}
Let’s analyze this snippet, which is the heart of our macOS sidebar menu in SwiftUI:
- @State: We use
@State private var selectedSection: AppSection?to hold the state. We initialize it to.dashboardso the app doesn’t launch with a blank screen. - List: We iterate over
AppSection.allCases. The critical parameter here isselection: $selectedSection. This is what binds the row the user clicks to our state variable. - NavigationLink(value:): In modern versions of SwiftUI, value-based navigation is the norm. We pass the section as a value, and SwiftUI automatically handles the visual highlighting in the sidebar when that value matches the selection.
- Label: We use a
Label, which is a standard SwiftUI component designed specifically to display text alongside an icon, ensuring perfect alignment. - navigationSplitViewColumnWidth: On macOS, users can drag the edge of the sidebar to resize it. This modifier allows us to set reasonable limits (minimum, ideal, and maximum) to prevent the user from breaking the layout by dragging too far.
Step 4: Designing the Detail View
If you try to compile the previous code in Xcode, you will notice it fails because DetailView doesn’t exist yet. Let’s create this view. Its responsibility will be to react to the sidebar selection and display the corresponding content.
You can add this structure in the same ContentView.swift file (below the main structure) or in a new file for organizational purposes:
struct DetailView: View {
    var section: AppSection?

    var body: some View {
        Group {
            if let section = section {
                switch section {
                case .dashboard:
                    DashboardView()
                case .statistics:
                    Text("Statistics View")
                        .font(.largeTitle)
                        .foregroundColor(.blue)
                case .messages:
                    Text("Inbox")
                        .font(.largeTitle)
                        .foregroundColor(.green)
                case .settings:
                    Text("App Preferences")
                        .font(.largeTitle)
                        .foregroundColor(.gray)
                }
            } else {
                // Fallback view if nothing is selected
                VStack(spacing: 16) {
                    Image(systemName: "hand.point.left")
                        .font(.system(size: 64))
                        .foregroundColor(.secondary)
                    Text("Select an option in the sidebar")
                        .font(.title)
                        .foregroundColor(.secondary)
                }
            }
        }
        // Main window title
        .navigationTitle(section?.rawValue ?? "Welcome")
    }
}

// A sample view for the Dashboard
struct DashboardView: View {
    var body: some View {
        VStack {
            Text("Main Control Panel")
                .font(.largeTitle)
                .padding(.bottom, 20)

            HStack(spacing: 20) {
                CardView(title: "Users", value: "1,204")
                CardView(title: "Sales", value: "$4,320")
            }
            Spacer()
        }
        .padding()
    }
}

struct CardView: View {
    var title: String
    var value: String

    var body: some View {
        VStack {
            Text(title)
                .font(.headline)
                .foregroundColor(.secondary)
            Text(value)
                .font(.system(size: 32, weight: .bold))
        }
        .frame(width: 150, height: 100)
        .background(Color(NSColor.controlBackgroundColor))
        .cornerRadius(12)
        .shadow(radius: 2)
    }
}
In this DetailView, we use a Group and a standard switch statement from Swift programming to determine which specific view to inject based on the optional value of section. If the value is nil (which would happen if we changed the initial selection or if we were on an iPad in portrait mode where the sidebar hides on launch), we politely display a message inviting the user to take action.
We have also included a small DashboardView with some cards (CardView) to demonstrate what real desktop content would look like, using native macOS semantic colors like NSColor.controlBackgroundColor.
Step 5: Customization and macOS-Specific Modifiers
As an iOS Developer, it is crucial to understand that the Mac has its own design language. Fortunately, SwiftUI does the heavy lifting, but there are details that make the difference between a “ported” app and one that feels truly native.
List Style
On macOS, the traditional sidebar has a specific translucent background (known as sidebar material). When using List within the first block of a NavigationSplitView, SwiftUI automatically applies the SidebarListStyle(). However, if you need to force it or organize the menu into collapsible sections (very common on macOS), you can do it like this:
List(selection: $selectedSection) {
    Section("General") {
        NavigationLink(value: AppSection.dashboard) {
            Label(AppSection.dashboard.rawValue, systemImage: AppSection.dashboard.iconName)
        }
        NavigationLink(value: AppSection.statistics) {
            Label(AppSection.statistics.rawValue, systemImage: AppSection.statistics.iconName)
        }
    }

    Section("Management") {
        NavigationLink(value: AppSection.messages) {
            Label(AppSection.messages.rawValue, systemImage: AppSection.messages.iconName)
        }
        NavigationLink(value: AppSection.settings) {
            Label(AppSection.settings.rawValue, systemImage: AppSection.settings.iconName)
        }
    }
}
.listStyle(.sidebar)
By using Section, macOS automatically adds small-caps headers and the ability to collapse the section with a “hide/show” button on hover. This is the exact behavior of native apps like Finder or Mail.
The Hide Sidebar Button
An immediate benefit of compiling your project in Xcode using NavigationSplitView is that macOS will automatically inject a button into the Toolbar of your top-left window. This button allows the user to toggle the visibility of the sidebar (hide or show it) without you having to write a single extra line of code to manage that animation or logic.
Conclusion on Mac Development
Creating a macOS sidebar menu in SwiftUI is an incredibly clean process compared to the days when we had to deal with AppKit and NSSplitViewController. Apple’s declarative framework has matured enough to allow any iOS Developer to transfer their mastery of Swift programming directly to the desktop environment.
By properly structuring your data model with enumerators, safely managing state, and relying on modern components like NavigationSplitView, you are laying a solid architectural foundation. From here, you can expand your application in Xcode, adding complex detail views, integrating databases with SwiftData or CoreData, and building a first-class desktop experience without leaving the ecosystem and language you already love. With SwiftUI, the boundary between mobile and desktop development has never been so thin.