



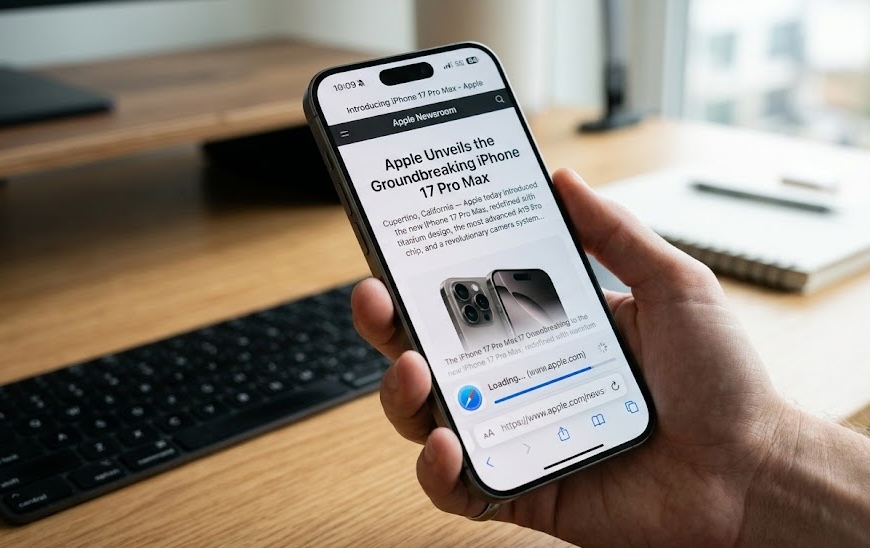

In the world of app development, connecting users with the outside world is a fundamental task. Whether you need to direct your users to your app’s terms of service, a support page, your social networks, or an interesting article, knowing how to handle web links is an essential skill. If you are an iOS Developer looking to master Apple’s modern interfaces, you are in the right place.
In this extensive tutorial, we will explore in depth how to open a URL in Safari with SwiftUI. We will learn how to implement this functionality not only for the iPhone or iPad but also for macOS and watchOS, leveraging the cross-platform nature of this framework. All of this, using the best practices of Swift programming, the latest tools in Xcode, and the declarative power of SwiftUI.
1. Preparing your environment in Xcode
Before diving into the code, it is important to ensure that we have our development environment correctly configured. To follow this Swift programming tutorial, you will need:
- A Mac running macOS Monterey or higher.
- Xcode 14 or higher installed (preferably the latest stable version).
- Basic knowledge of Swift and the structure of a SwiftUI project.
To get started, open Xcode and create a new project. Select the “App” template under the “Multiplatform” tab, or “iOS” if you prefer to focus solely on mobile devices. Make sure the selected language is Swift and the interface is SwiftUI. This initial setup guarantees that we can test our code in iOS, watchOS simulators, and on our own Mac.
2. Understanding URLs in Swift programming
In Swift, a URL is not simply a text string (String). It is a strongly typed structure called URL. When you try to create a URL from a String, the initializer returns an optional value (URL?), because the provided text might not be a valid link (for example, it could contain unencoded spaces or invalid characters).
As a good iOS Developer, you must handle these optionals safely to prevent your application from crashing unexpectedly.
import Foundation

let validString = "https://www.apple.com"
if let url = URL(string: validString) {
    // The URL is valid and we can use it
    print("URL successfully created: \(url)")
} else {
    // Error handling if the string is not a valid URL
    print("Invalid URL")
}
This concept is the foundation for any action that involves web navigation within our code.
3. Method 1: Using the Link view in SwiftUI
Starting with iOS 14, macOS 11, and watchOS 7, Apple introduced a native view specifically designed to handle hypertext links: the Link view. This is the most direct, simple, and declarative way to open a URL in Safari with SwiftUI.
Basic use of Link
The Link view requires two main parameters: the text (or view) that the user will see and tap, and the URL object it will direct to.
Here is how to implement it in your ContentView in Xcode:
import SwiftUI

struct ContentView: View {
    var body: some View {
        VStack(spacing: 20) {
            Text("Tutorial: Opening web links")
                .font(.largeTitle)
                .fontWeight(.bold)

            // We safely verify the URL
            if let appleURL = URL(string: "https://www.apple.com/") {
                Link("Visit the Apple website", destination: appleURL)
                    .font(.title2)
                    .foregroundColor(.blue)
            } else {
                Text("Error: Invalid link")
                    .foregroundColor(.red)
            }
        }
        .padding()
    }
}
When you run this code in the Xcode simulator, tapping the “Visit the Apple website” text will cause the system to automatically leave your app and open Safari on iOS, the default browser on macOS, or present the optimized web view on watchOS.
Advanced customization of Link
One of the great advantages of SwiftUI is its flexibility. The Link component doesn’t have to be just simple text. You can wrap any view inside a Link, such as images, icons, or complex buttons.
import SwiftUI

struct CustomLinkView: View {
    var body: some View {
        if let githubURL = URL(string: "https://github.com") {
            Link(destination: githubURL) {
                HStack {
                    Image(systemName: "network")
                        .font(.title)
                    Text("Go to repository")
                        .fontWeight(.semibold)
                }
                .padding()
                .foregroundColor(.white)
                .background(Color.black)
                .cornerRadius(10)
                .shadow(radius: 5)
            }
        }
    }
}
This way, you can integrate the action of opening a webpage while keeping the design and style guide of your application intact.
4. Method 2: Using @Environment(\.openURL)
Although the Link view is fantastic for direct user interactions, sometimes, as an iOS Developer, you need to open a link programmatically. For example, you might want to open a URL only after an API call has completed, after form validation, or when tapping an item in a list (List) that is not an explicit button.
For these advanced Swift programming cases, SwiftUI provides us with the openURL environment value.
What is openURL?
@Environment(\.openURL) gives us access to an OpenURLAction structure. We can invoke this action by passing it a URL, and the system will take care of opening it.
Programmatic implementation
Let’s see how to use this technique within a standard SwiftUI Button.
import SwiftUI

struct ProgrammaticURLView: View {
    // We declare the environment variable
    @Environment(\.openURL) var openURL

    // Example URL
    let blogURL = URL(string: "https://developer.apple.com/swift/")!

    var body: some View {
        Button(action: {
            // Previous logic (e.g., analytics, validations)
            print("The user has decided to open the Swift blog")

            // We execute the action to open the URL
            openURL(blogURL)

        }) {
            Text("Learn more about Swift")
                .padding()
                .frame(maxWidth: .infinity)
                .background(Color.blue)
                .foregroundColor(.white)
                .clipShape(Capsule())
        }
        .padding()
    }
}
Handling the result of openURL
A very powerful feature of OpenURLAction in Swift programming is that it allows you to know if the system was able to open the URL successfully. The openURL call can take a completion closure that returns a boolean.
Button("Open link with validation") {
    if let url = URL(string: "https://my-madeup-domain.com") {
        openURL(url) { accepted in
            if accepted {
                print("Safari opened the URL successfully.")
            } else {
                print("The system rejected the URL or could not find an app to open it.")
            }
        }
    }
}
This function is vital for an iOS Developer when handling Deep Links or custom URL schemes (for example, trying to open WhatsApp with whatsapp://), allowing you to show an alert to the user if they do not have the target application installed.
5. Multiplatform Considerations: iOS, macOS, and watchOS
One of the reasons SwiftUI has revolutionized the Apple ecosystem is its “Learn once, apply anywhere” capability. The code we have written to open a URL in Safari with SwiftUI works across multiple platforms, but the behavior of the underlying operating system varies slightly to adapt to the user experience of each device.
- On iOS / iPadOS: When using
LinkoropenURL, the system will send the request to Safari (or the user’s default browser if they have changed it in settings). The application will temporarily go to the background. - On macOS: When compiling your Xcode project for Mac, the system will open the URL in Safari or the Mac’s default browser (Chrome, Firefox, Safari, etc.). A new tab or window will open in the corresponding browser.
- On watchOS: The Apple Watch handles URLs uniquely. Starting with watchOS 7, if the user taps a
Linkpointing to a standard web page (http/https), the watch will use a miniature Safari WebKit to load a simplified reading view directly on the wrist, without needing to pull out the iPhone.
It is crucial to always test your Swift implementations in the different simulators within Xcode to ensure that the user experience (UX) is consistent across all target devices.
6. Alternatives and the UIKit ecosystem (For context)
Although we are focused on SwiftUI, a good iOS Developer always knows the context of their framework. Before the arrival of iOS 14 and the openURL environment modifier, the traditional way in Swift to open links was using the UIKit framework via the UIApplication singleton.
// Old method (only applicable in iOS)
if let url = URL(string: "https://www.apple.com"), UIApplication.shared.canOpenURL(url) {
    UIApplication.shared.open(url)
}
While this code is still valid and will compile without issues in a current project, its use within SwiftUI views is strongly discouraged. The approach with @Environment(\.openURL) or the Link view is much cleaner, respects the declarative paradigm, facilitates testing, and most importantly, is cross-platform, whereas UIApplication is strictly tied to iOS.
7. Best Practices and Accessibility
When implementing links in your Xcode projects, keep the following best practices in mind:
- Clarity on the destination: Make sure the text of the link or button makes it clear to the user that they are about to leave the app. Using icons like a square with an arrow pointing out (the “external” symbol) helps visually.
- Accessibility (VoiceOver): SwiftUI does a great job by default, but you can always improve the experience for visually impaired users.
Link("Support", destination: supportURL)
    .accessibilityLabel("Open the technical support web page in Safari")
- Security: Always validate your URLs. Never trust dynamic strings coming from user input without ensuring they form a valid
URLbefore passing them toopenURL.
8. Conclusion
Mastering external navigation is one of the fundamental tasks of any iOS Developer. As we have seen, opening a URL in Safari with SwiftUI is an incredibly efficient and elegant process thanks to the modern tools Apple provides us.
Whether you choose to use the declarative Link view for simple interfaces or prefer to invoke @Environment(\.openURL) to handle more complex logical flows in your code, Swift programming offers robust and secure solutions.