
If you’ve arrived at this article through a search like “download xcode for windows exe” or “how to code swiftui from pc,” let me start with a virtual hug. I understand you perfectly. You are an aspiring iOS developer, attracted by the elegance of Swift and the declarative modernity of SwiftUI, but your main machine is a Windows 11 gaming beast or a corporate laptop that doesn’t have a bitten apple on the lid.
The Apple ecosystem is famous for its walled garden. To develop native applications for iOS, macOS, watchOS, or visionOS, there is only one official gateway: Xcode. And Xcode, my friends, only runs on macOS.
So, is this the end of your dream of becoming a Swift programming expert if you don’t currently own a Mac? Absolutely not.
This article is the most honest and complete guide you will find regarding the myth of “Xcode for Windows.” I won’t sell you smoke: there is no magic .exe installer. But there are viable workarounds that thousands of developers use daily to start building apps and understanding the ecosystem without having a physical Mac on their desk immediately.
Below, we will analyze the most realistic options, from virtualization to the cloud, evaluating how they perform—especially when trying to work with demanding tools like the SwiftUI Canvas.
The Harsh Reality: Why Native Xcode for Windows Doesn’t Exist
Before jumping into solutions, it is vital to understand the root problem. Why doesn’t Apple simply release a version of Xcode for Windows and expand its developer base?
It is not just a corporate whim (although there is some strategy involved). Xcode is not just a glorified text editor; it is an Integrated Development Environment (IDE) deeply intertwined with the macOS operating system.
When you compile an iOS app, Xcode uses a complex toolchain (LLVM, Clang) and, crucially, links your code with Apple’s proprietary frameworks: UIKit (for older interfaces), SwiftUI (for modern, declarative interfaces), Foundation, Core Data, etc. These frameworks depend on low-level libraries (like Cocoa and AppKit) that only exist within the macOS architecture.
Porting Xcode to Windows would mean rewriting almost the entire underlying operating system of Apple to work on top of the Windows kernel. That is not going to happen.
Therefore, all viable solutions to “use Xcode if you have Windows” boil down to a single premise: We must find a way to run macOS (the operating system) inside or through your PC.
Option 1: The Warrior’s Path (macOS Virtualization)
This is the most popular solution for beginners, the most “free” (in monetary terms, not in time invested), and the one requiring the most technical knowledge. It consists of using Virtual Machine (VM) software to run a macOS installation inside a window on your Windows PC, tricking it into believing it is running on Apple hardware.
The Necessary Tools
The main contenders in the virtualization world are VMware Workstation (or Player) and Oracle VirtualBox. Historically, VMware tends to offer slightly better graphics acceleration, which will be critical if you plan to use the SwiftUI Canvas.
The Process (Summarized)
Important Legal Disclaimer: The macOS software license (EULA) explicitly prohibits installing the operating system on non-Apple hardware. This tutorial is for educational purposes, and you must be aware of the legal gray areas this implies. Apple does not support this method.
- Get the macOS Image: You need an ISO or DMG image of a recent version of macOS (like Sonoma or Ventura) compatible with the version of Xcode you want to use. Ideally, you should create it yourself from a friend’s real Mac to ensure the file is safe.
- The “Unlocker”: VMware and VirtualBox do not have the option to install “macOS” by default on Windows. You need to find and run a small script known as an “unlocker” that patches the virtualization software to show the Apple option in the VM creation menu.
- Configuring the Beast (Hardware): You cannot skimp on resources. macOS is demanding. You must assign significant resources to the VM. Think of at least 4 CPU cores and an absolute minimum of 8GB of RAM (ideally 16GB) dedicated solely to the virtual machine if you want Xcode to launch and compile without crashing the system.
- Installing Xcode: Once macOS is running in your Windows window, the process is normal: open the App Store inside the VM, log in with your Apple ID, and download Xcode.
The Experience with Swift and SwiftUI in a VM
Here is where reality hits the enthusiastic iOS developer. The experience ranges from “tolerable for learning” to “frustrating for working.”
- Pure Swift Programming: If your initial goal is just to learn Swift syntax, write business logic, classes, structures, and algorithms without much graphical interface, the VM works reasonably well. The text editor and compiler do not require that much graphics power.
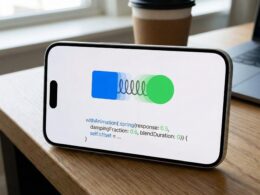
- SwiftUI Canvas and Simulators: This is where it hurts. The SwiftUI Canvas (that real-time preview allowing you to see how your design looks while you code) relies heavily on graphics acceleration (GPU) and frameworks like Metal. VMs often struggle to do a good “passthrough” of your NVIDIA or AMD graphics card power to the virtualized macOS.
- Usual Result: The Canvas will often fail, stay black, throw rendering errors, or be extremely slow. iOS simulators will boot, but animations (transitions, scrolling) will stutter, making it difficult to evaluate the real user experience.
Verdict: It is functional for learning syntax and basic concepts, but be prepared to disable the SwiftUI Canvas often and compile directly to the simulator, with the consequent loss of time in each iteration.
Option 2: The Investor’s Path (Mac in the Cloud)
If your PC isn’t powerful enough to virtualize macOS decently, or you simply don’t want to deal with complex configurations, dubious patches, and potential instabilities, the cloud is your best friend.
The concept is simple: there are companies that maintain server farms full of real Mac minis and Mac Pros in data centers. You pay them a fee (hourly or monthly), and they give you remote access to one of those machines.
Popular Providers
- MacinCloud: Perhaps the most famous and established provider. They offer a variety of plans, from “pay-as-you-go” (you pay for the hours you connect) to monthly subscriptions with unlimited access.
- MacStadium: Oriented more towards companies and teams needing Continuous Integration (CI/CD) infrastructure, but they also offer useful options for individuals needing a dedicated Mac.
- Scaleway: A European option offering Mac minis with Apple Silicon chips (M1/M2) in the cloud with hourly billing.
How does it work?
You connect via standard Windows Remote Desktop (RDP) clients or VNC solutions. Basically, you are streaming the screen of the remote Mac to your monitor.
The Experience for the iOS Developer
This option completely removes the hardware barrier. You are using a real Mac, certified by Apple, often with powerful Apple Silicon chips.
- Pros: Xcode runs natively and stably. You have access to the full power of the machine. You can sign applications with your developer certificates and upload them to the App Store without any strange technical issues. Swift programming is as it should be.
- Cons: You depend 100% on your internet connection. Latency (lag) is the enemy. Depending on your speed and the physical location of the provider’s server, there may be a noticeable delay between the moment you type a line of code in SwiftUI and the moment it appears on the screen. Writing code or designing interfaces with lag can be a maddening experience for long sessions. Additionally, the monthly cost can add up if you use it intensively.
An Important Alternative: Learning Swift on Windows (Without Xcode)
There is a very common confusion among beginners that we must clarify. Swift (the programming language) and Xcode (the IDE needed to make visual Apple apps) are different things.
For a few years now, the Swift language has been officially open source and cross-platform, and it has growing official support for Windows!
What can you do with native Swift on Windows?
You can install the Swift toolchain directly on Windows 10/11. You can use a lightweight editor like Visual Studio Code (VS Code) with the official Swift extension for syntax highlighting and autocomplete.
- You can learn 90% of Swift programming syntax: variables, loops, optionals, generics, structs, classes, and modern concurrency (async/await).
- You can develop powerful server applications (backend) using frameworks like Vapor.
- You can write command-line scripts and system tools.
What CAN’T you do?
You cannot import Apple’s visual frameworks. You cannot write import SwiftUI or import UIKit. You cannot show a button on the screen, nor use the iPhone simulator, nor access Core Data.
Verdict: It is a fantastic option (and the most recommended) for your first few weeks if you want to master the fundamentals of the pure language without any technical friction while deciding whether to invest in hardware.
The Hybrid Solution: Do you have a recent iPad?
If you happen not to have a Mac but do have a relatively recent iPad (especially Air or Pro models with M-series chips), you have a surprising backdoor into the ecosystem.
Swift Playgrounds 4 (and later versions) on iPadOS has evolved tremendously. It is no longer just an educational tool for kids. It now allows you to build real applications using SwiftUI, preview them in real-time with excellent performance (better than a VM), and even upload them directly to App Store Connect for publication right from the iPad.
It is not full Xcode (it lacks advanced memory debugging instruments, complex asset management, and continuous integration capabilities), but for an iOS developer just starting out who wants to build their first apps, it is an incredibly capable and portable tool.
Conclusion: Your Battle Plan
Being an aspiring iOS developer trapped in the Windows world is a challenge, but not an insurmountable wall. Here is the summary of your action plan depending on your situation:
- The Absolute Student (Zero Budget): Start by installing native Swift on Windows and use VS Code. Forget about the graphical interface for now. Master the language syntax. It is the foundation you need anyway.
- The Technical Explorer (Unafraid to configure): Try the virtualization route (Option 1). You will need a powerful PC. Be prepared for the SwiftUI Canvas to be slow, but you will be able to compile and run your first apps in the simulator.
- The Pragmatist (Needs results now): Rent a Mac in the cloud (Option 2). It is the most stable way to access real Xcode without buying hardware, ideal for finishing a specific project or an intensive course.
The final reality you must accept is that “Xcode for Windows” workarounds are temporary bridges. They serve to cross the initial river and validate if you are truly passionate about this world.
If, after trying these options, you discover that you love Swift and SwiftUI, your medium-term goal should be to get a Mac. It doesn’t have to be the latest €3000 MacBook Pro. A second-hand Mac mini M1 or M2 is an absolutely beastly iOS development machine, very affordable, and is the most profitable investment you will make in your career as an Apple developer.
If you have any questions about this article, please contact me and I will be happy to help you 🙂. You can contact me on my X profile or on my Instagram profile.