The first impression matters, and in the world of mobile apps, that first impression often lasts less than three seconds. It’s the brief moment when a user taps your app’s icon and waits for something magical to happen. This initial canvas is what we know as a “Splash Screen.”
But in Apple’s ecosystem, this concept is more nuanced than it seems. It’s not just about showing a logo; it’s a technical choreography between the operating system and your application to create a fluid, fast, and professional user experience.
In this in-depth article, we will demystify the “splash screen,” differentiate it from its mandatory cousin, the “launch screen,” explore the design best practices dictated by Apple, and, most importantly, build several types of splash screens in SwiftUI, from the simplest to a robust, professional architecture.
Splash Screen vs. Launch Screen
The most common mistake when starting out is confusing these two terms. Failing to understand their difference leads to poor user experiences and technical frustration.
1. The Launch Screen
This is not a splash screen. The Launch Screen is a mandatory requirement from Apple. It’s a storyboard or a configuration in your Info.plist that the operating system (iOS/iPadOS) displays immediately after the user taps your app icon.
- Purpose: Its only function is to give instant feedback to the user. It shows that the app has responded to the tap while the OS loads your application’s binary into memory.
- Who controls it: The Operating System (iOS).
- When it’s shown: Before a single line of your Swift code executes.
- Nature: It is completely static. You cannot run code, perform animations, or load data here. It’s just an image, a background color, or a very simple Storyboard.
Apple’s Recommendation (Human Interface Guidelines): Apple discourages using the Launch Screen for branding. Their guideline is that the Launch Screen should resemble the first frame of your app’s interface as closely as possible. Think of a “skeleton” or ghost version of your UI. This creates the illusion that the app loads instantly. Showing a logo here and then jumping to the main app can be visually jarring.
2. The Splash Screen
This is the screen that most developers want to build. It is the first view that your code displays after the Launch Screen disappears and your app has finished loading.
- Purpose: Multiple. It can be used for:
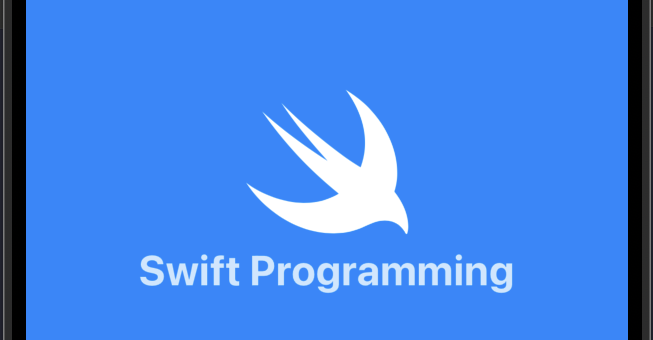
- Branding: Displaying your logo and brand (the most common use case, like Netflix or X).
- Data Loading: Performing initial setup tasks (loading a configuration, downloading essential data).
- State Checking: Verifying if the user is authenticated, if they’ve seen the onboarding, etc.
- Who controls it: Your application (your SwiftUI code).
- When it’s shown: After the Launch Screen disappears and your SwiftUI
Appstruct is initialized. - Nature: It is completely dynamic. Here you can run animations, make network calls, perform business logic, and do anything SwiftUI allows.
In summary: Launch Screen (static, OS-controlled, for speed) ➡️ Splash Screen (dynamic, App-controlled, for branding/loading) ➡️ Main Content.
Best Practices and Anti-Patterns
Before we write any code, let’s talk about what makes a good splash screen.
What You SHOULD Do
- Be fast: The goal of a splash screen is not to be seen. Its goal is to cover necessary work. If you are only showing your logo, the transition should be almost instantaneous (1-2 seconds maximum).
- Smooth transition: Ensure the transition from your Launch Screen (which should be a simple background color or UI skeleton) to your Splash Screen is fluid. A fade-in works well.
- Show progress (if it’s long): If your “splash” is covering a data download that genuinely takes more than 3-4 seconds (e.g., in a game), replace your logo with a progress indicator (a
ProgressViewin SwiftUI). - Match the Launch Screen: An advanced technique is to make your Launch Screen (defined in
Info.plist) and your Splash Screen (your first SwiftUIView) look exactly the same (same background color, same logo in the same position). This makes the transition from the OS to your app 100% invisible to the user.
What NOT To Do (Anti-Patterns)
- Adding artificial delays: This is the cardinal sin. Never do this:
Task.sleep(for: .seconds(3)). Don’t make the user wait 3 seconds just so they can see your logo. Users want to use your app, not admire your brand. If the app can load in 0.5 seconds, let it load in 0.5 seconds. - Advertising: Never use a splash screen to show an ad. It’s a violation of user trust and a surefire way to get your app uninstalled.
- Asking for permissions: Don’t ask for notification, location, or camera permissions on the splash screen. It’s the worst possible context. Ask for them when the user tries to use a feature that requires them.
- Sound: Never.
Implementing Splash Screens in SwiftUI
Now for the fun part. We will look at three methods, from basic to professional, for creating a dynamic splash screen in SwiftUI.
Step 0: Configure the Launch Screen (Mandatory)
Even if you’re using pure SwiftUI, you must configure the static Launch Screen.
- In Xcode, go to the Project Navigator and select your project.
- Go to the General tab and find the “App Icons and Launch Screen” section.
- Ensure you have a Launch Screen File (you can leave the default
LaunchScreen.storyboard) or, even better for SwiftUI apps, use theInfo.plistconfiguration. - Go to your target’s Info tab.
- Add a new dictionary called “Launch Screen” (or
UILaunchScreen). - Inside this dictionary, you can add keys like:
UIColorName: The name of a color in your Asset Catalog for the background.UIImageName: The name of an image in your Asset Catalog to display centered.
Configuring this ensures you don’t have a black screen while the app loads, making the transition to your SwiftUI splash screen much cleaner.
Method 1: The Simple Approach (@State and .onAppear)
This method is great for a simple branding splash that just needs to show for a moment and then disappear. We use a simple @State boolean to control which view is shown.
In your main view (often ContentView), you manage the state.
import SwiftUI

struct ContentView: View {
    // 1. A state to control if the splash is active
    @State private var isSplashActive = true

    var body: some View {
        ZStack {
            if isSplashActive {
                // Show the Splash view
                SplashView()
                    .onAppear {
                        // 2. Simulate work (or just show the logo)
                        // NEVER use this in production if it's not needed.
                        // This is just to simulate a short load time.
                        DispatchQueue.main.asyncAfter(deadline: .now() + 2.0) {
                            // 3. When done, deactivate the splash
                            withAnimation(.easeOut(duration: 0.5)) {
                                self.isSplashActive = false
                            }
                        }
                    }
            } else {
                // Show the main app content
                MainAppView()
            }
        }
    }
}

// Your Splash Screen View
struct SplashView: View {
    var body: some View {
        ZStack {
            Color("AppBackgroundColor") // Make sure this color matches your Launch Screen
                .ignoresSafeArea()

            Image("logo") // Your logo
                .resizable()
                .aspectRatio(contentMode: .fit)
                .frame(width: 150)
        }
    }
}

// Your main app
struct MainAppView: View {
    var body: some View {
        Text("Welcome to the App!")
            .font(.largeTitle)
    }
}- Pro: Very simple to understand and implement.
- Con:
DispatchQueue.main.asyncAfteris an artificial delay. It’s better to replace it with real work.
Method 2: The Realistic Approach (.task and Async Loading)
This is the most common use case. You want to show the splash screen while you perform a real asynchronous task, like loading user data or settings from an API.
We use SwiftUI’s .task modifier, which is designed for async/await.
import SwiftUI

struct ContentView: View {
    @State private var isLoading = true

    var body: some View {
        if isLoading {
            SplashView()
                .task { // 1. Runs when the view appears
                    await loadInitialData() // 2. Call your async function

                    // 3. When finished, update the state on the main thread
                    withAnimation {
                        self.isLoading = false
                    }
                }
        } else {
            MainAppView()
        }
    }

    // 4. Async data loading function
    func loadInitialData() async {
        // This is where you do your real work
        // - Check authentication
        // - viewModel.fetchInitialSettings()
        // - database.setup()

        // We simulate a 2-second network call
        try? await Task.sleep(nanoseconds: 2_000_000_000)
    }
}

// SplashView and MainAppView remain the same- Pro: This is the modern, correct way to handle loading. The splash is shown for exactly as long as the real work takes. No artificial delays.
- Con: The logic for “what to show” (login? onboarding? home?) is all inside
ContentView, which can become complicated.
Method 3: The Professional Approach (A State “Router”)
For a real, scalable app, you don’t just have two states (loading and loaded). You have multiple states: loading, needsOnboarding, unauthenticated, authenticated.
The best way to handle this is with a state “Router,” often implemented as an ObservableObject (ViewModel) that is injected into the environment.
1. Define your app’s states:
import Foundation

// The possible states your app can be in
enum AppState {
    case loading
    case needsOnboarding
    case unauthenticated
    case authenticated
}
2. Create a ViewModel to manage the state:
import SwiftUI

@MainActor // Ensures @Published updates happen on the main thread
class AppStateManager: ObservableObject {

    @Published var appState: AppState = .loading

    // This object could have other services injected
    // private var authService: AuthService
    // private var userDefaults: UserDefaults

    init() {
        checkCurrentAppState()
    }

    func checkCurrentAppState() {
        // Put your decision logic here
        // This is asynchronous, so we wrap it in a Task
        Task {
            // 1. We start in the loading state
            self.appState = .loading

            // Simulate real work (network checks, database...)
            try? await Task.sleep(nanoseconds: 2_500_000_000)

            // 2. Decision logic
            let hasSeenOnboarding = UserDefaults.standard.bool(forKey: "hasSeenOnboarding")
            let isLoggedIn = false // Simulate: authService.isUserLoggedIn

            // 3. Update the state based on the logic
            if !hasSeenOnboarding {
                self.appState = .needsOnboarding
            } else if !isLoggedIn {
                self.appState = .unauthenticated
            } else {
                self.appState = .authenticated
            }
        }
    }
}
3. Set up your App and ContentView:
In your main ...App.swift file:
import SwiftUI

@main
struct MyApp: App {
    // 1. Create a single instance of the state manager
    @StateObject private var appStateManager = AppStateManager()

    var body: some Scene {
        WindowGroup {
            // 2. Call your root view
            RootView()
                // 3. Inject it into the environment so all child views
                // can access it (and react to its changes)
                .environmentObject(appStateManager)
        }
    }
}
4. Create the RootView that acts as a Router:
This view does nothing but decide which main screen to show.
import SwiftUI

struct RootView: View {
    // 1. Listen for changes from the state manager
    @EnvironmentObject var appStateManager: AppStateManager

    var body: some View {
        Group {
            // 2. A giant switch on the app's state
            switch appStateManager.appState {
            case .loading:
                SplashView() // Your splash screen

            case .needsOnboarding:
                OnboardingView() // Your onboarding flow

            case .unauthenticated:
                LoginView() // Your login screen

            case .authenticated:
                MainTabView() // The main app (with tabs, etc.)
            }
        }
        // Apply animations to the transition between these states
        .animation(.easeInOut(duration: 0.3), value: appStateManager.appState)
    }
}- Pro: This is by far the cleanest, most scalable, and most professional architecture.
- Your “Splash Screen” is now just the app’s
.loadingstate. - Business logic is centralized in
AppStateManager. - Your views (
LoginView,MainTabView) are independent and don’t need to know anything about the loading state. - You can change the state from anywhere in the app by calling
appStateManager.appState = .unauthenticated(e.g., on logout).
- Your “Splash Screen” is now just the app’s
Adding Magic: Animations
Your SplashView (from Method 3) no longer needs to manage timers. Its only responsibility is to look good. Now you can add purely visual animations.
struct SplashView: View {
    @State private var scale: CGFloat = 0.8
    @State private var opacity: Double = 0.0

    var body: some View {
        ZStack {
            Color("AppBackgroundColor").ignoresSafeArea()

            Image("logo")
                .resizable()
                .aspectRatio(contentMode: .fit)
                .frame(width: 150)
                .scaleEffect(scale)
                .opacity(opacity)
                .onAppear {
                    // Pulse + fade-in animation on appear
                    withAnimation(.easeInOut(duration: 1.0).repeatForever(autoreverses: true)) {
                        self.scale = 1.0
                    }

                    withAnimation(.easeIn(duration: 0.8)) {
                        self.opacity = 1.0
                    }
                }
        }
    }
}
Conclusion
The “splash screen” is much more than a simple image. It’s a fundamental part of your app’s startup flow and a critical tool for managing user perception and setup tasks.
We’ve learned the vital difference between the Launch Screen (static, OS-controlled) and the Splash Screen (dynamic, app-controlled). And we’ve seen how to evolve our SwiftUI implementation from a simple @State boolean to a robust State Router using an ObservableObject.
Remember the golden rule: respect the user’s time. Use a splash screen only to cover necessary work and make the entry into your application as fast and fluid as possible. The best splash screen is one that is barely noticed.
If you have any questions about this article, please contact me and I will be happy to help you 🙂. You can contact me on my X profile or on my Instagram profile.