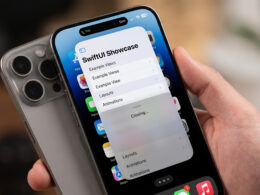

Every modern iOS Developer knows that creating a seamless, immersive user experience often means taking complete control over the screen’s real estate. When diving into Swift programming, one of the most common UI requirements you will encounter is the need to customize or completely remove default system components. Whether you are building a full-screen media player, a custom onboarding flow, or a highly branded application, you will eventually need to hide navigation bar in SwiftUI.
Since its introduction, SwiftUI has dramatically changed how we build user interfaces across the Apple ecosystem. However, handling navigation has historically been a moving target. In this comprehensive tutorial, we will explore the evolution of navigation in Swift, how to hide the navigation bar using the latest APIs in Xcode, and how to ensure your code works flawlessly across iOS, macOS, and watchOS.
The Evolution of Navigation in SwiftUI
In the early days of SwiftUI, developers relied on NavigationView to handle stack-based navigation. To hide the navigation bar back then, you had to use the .navigationBarHidden(true) modifier. While this worked for iOS, it often led to unpredictable behaviors when pushing new views or managing complex view hierarchies.
Apple deprecated NavigationView in iOS 16, macOS 13, and watchOS 9, replacing it with the much more robust and data-driven NavigationStack. With this architectural shift, the old modifiers were also deprecated in favor of a more unified toolbar API. Today, as an iOS Developer, you must adapt to these new patterns to write future-proof Swift programming code.
How to Hide Navigation Bar in SwiftUI (The Modern Way)
To hide navigation bar in SwiftUI using the modern NavigationStack, Apple introduced the .toolbar(_:for:) modifier. This powerful API allows you to explicitly hide or show toolbars and navigation bars based on the context of the view.
Open Xcode, create a new SwiftUI project, and look at the following example:
import SwiftUI

struct ContentView: View {
    var body: some View {
        NavigationStack {
            VStack {
                Text("Welcome to the Home Screen")
                    .font(.title)
                    .padding()

                NavigationLink("Go to Detail View", destination: DetailView())
                    .buttonStyle(.borderedProminent)
            }
            // Hiding the navigation bar on the root view
            .toolbar(.hidden, for: .navigationBar)
        }
    }
}
In this snippet, we attach .toolbar(.hidden, for: .navigationBar) directly to the VStack inside the NavigationStack. It is a common mistake to apply this modifier to the NavigationStack itself, which will not yield the expected results.
Applying it to Pushed Views
Often, you want the root view to have a navigation bar, but you want to hide it on a specific child view. Here is how you manage that transition smoothly:
struct DetailView: View {
    @Environment(\.dismiss) var dismiss

    var body: some View {
        ZStack {
            Color.blue.ignoresSafeArea()

            VStack {
                Text("This is the Detail View")
                    .foregroundColor(.white)
                    .font(.largeTitle)

                Button("Go Back") {
                    dismiss()
                }
                .padding()
                .background(Color.white)
                .cornerRadius(10)
            }
        }
        // Hiding the navigation bar on the pushed view
        .toolbar(.hidden, for: .navigationBar)
    }
}
Because we hid the navigation bar, the default system back button is also gone. To fix this, we implement a custom “Go Back” button utilizing the @Environment(\.dismiss) property to programmatically pop the view off the stack.
Restoring the Swipe-to-Go-Back Gesture
When you hide navigation bar in SwiftUI, you inadvertently disable the native swipe-to-go-back gesture on iOS. This can be incredibly frustrating for users who rely on muscle memory to navigate your app.
To maintain a high-quality user experience while writing Swift, you need to restore this gesture. While SwiftUI doesn’t offer a native, single-line modifier to bring the gesture back while the bar is hidden, you can achieve this by hooking into the underlying UIKit navigation controller via an extension.
import SwiftUI

extension UINavigationController: UIGestureRecognizerDelegate {
    override open func viewDidLoad() {
        super.viewDidLoad()
        interactivePopGestureRecognizer?.delegate = self
    }

    public func gestureRecognizerShouldBegin(_ gestureRecognizer: UIGestureRecognizer) -> Bool {
        return viewControllers.count > 1
    }
}
By adding this snippet anywhere in your Xcode project, the interactive pop gesture will be globally restored for all your NavigationStack hierarchies, even when the visual navigation bar is entirely hidden.
Expanding to macOS and watchOS
One of the greatest strengths of SwiftUI is its cross-platform capability. The same code you write for iOS can often be adapted for macOS and watchOS with minimal changes.
macOS Implementation
On macOS, the concept of a “navigation bar” translates to the window’s toolbar. If you are building a Mac app in Xcode and want a completely custom window without the standard toolbar, you can use a similar approach. However, macOS handles window chromes slightly differently.
struct MacContentView: View {
    var body: some View {
        NavigationStack {
            Text("macOS Custom Window")
                .frame(minWidth: 400, minHeight: 300)
                // Hiding the window toolbar on macOS
                .toolbar(.hidden, for: .windowToolbar)
        }
    }
}
Notice the subtle difference: we use .windowToolbar instead of .navigationBar. This distinction is crucial for cross-platform Swift programming.
watchOS Implementation
For watchOS, screen space is incredibly limited, making custom navigation headers even more critical. The .navigationBar hidden modifier works similarly on watchOS.
struct WatchContentView: View {
    var body: some View {
        NavigationStack {
            VStack {
                Text("watchOS View")
            }
            // Hides the title/time bar on Apple Watch
            .toolbar(.hidden, for: .navigationBar)
        }
    }
}
Hiding the navigation bar on watchOS removes the time and the back button, giving you total control over the digital crown and screen layout for immersive fitness or media apps.
Summary
Mastering how to hide navigation bar in SwiftUI is an essential skill for any modern iOS Developer. By transitioning from the deprecated NavigationView to the modern NavigationStack, you ensure your Swift programming practices are up to date and compatible with the latest OS releases.
Remember to always apply the .toolbar(.hidden, for: .navigationBar) modifier to the view inside the navigation stack, not the stack itself. Furthermore, always consider the user experience: if you hide the default navigation bar, be sure to provide an intuitive custom back button and restore the native swipe-to-go-back gesture using the UIKit extension provided.
By leveraging these techniques in Xcode, you can craft beautiful, edge-to-edge custom interfaces in SwiftUI that look and feel incredible across iOS, macOS, and watchOS.