


In the mobile interface design ecosystem, feedback is king. When a user performs an action—saving a file, sending a message, or deleting an item—they expect immediate confirmation.
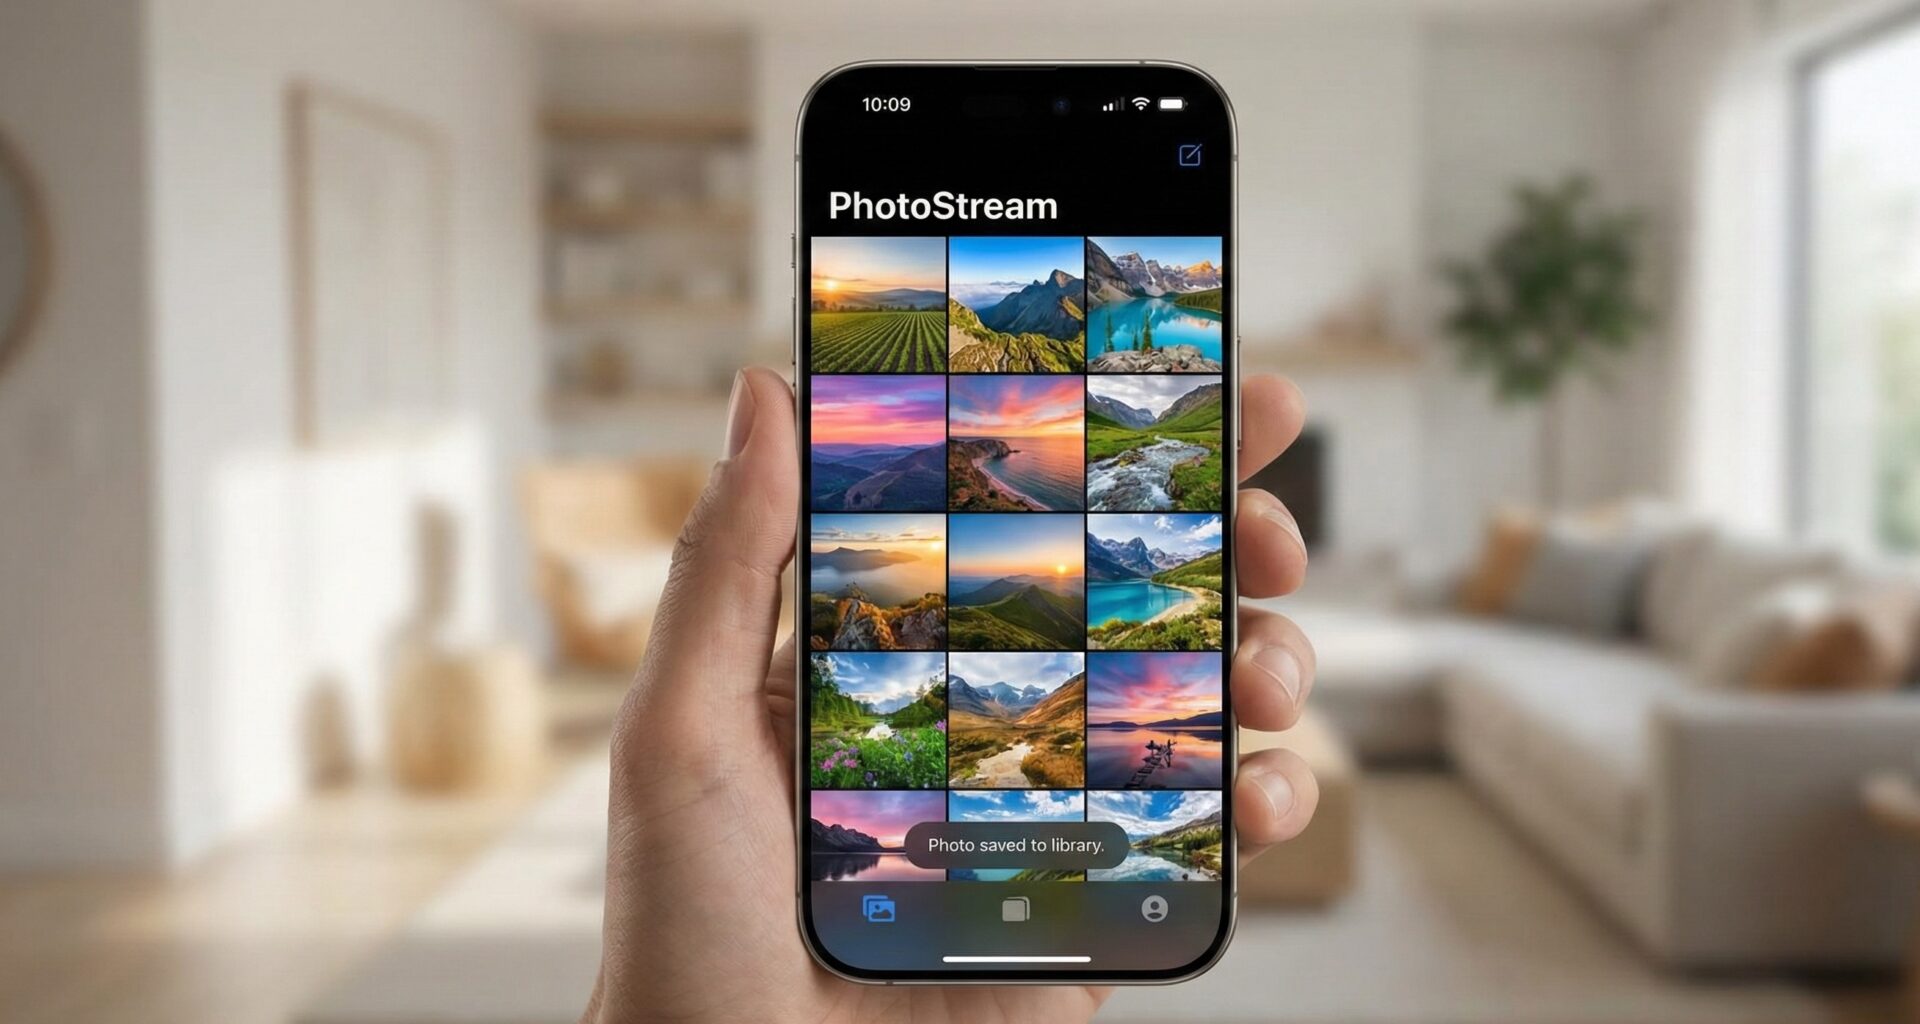
This is where the Toast (or Toast Banner) comes in. Unlike an Alert, which interrupts the flow and demands a click, or a Sheet, which changes the context, the Toast is ephemeral, non-blocking, and purely informative. It’s that small rounded rectangle that appears, says “Saved successfully,” and fades away.
Although Android has had this natively forever, in iOS and SwiftUI, we must build it ourselves. In this tutorial about display a toast notification or banner in SwiftUI, we won’t just make text appear; we will build a robust, animated, accessible, and reusable notification architecture.
1. Anatomy of a Perfect Toast
Before writing code, we must define what makes a Toast feel “native” on iOS, even though it isn’t.
- Position: Generally at the bottom (floating above the TabBar) or at the top (Dynamic Island style).
- Appearance: Blurred background (Blur Material) or solid color with high contrast, rounded corners, and subtle shadow.
- Content: An icon (SF Symbol) and a short message.
- Behavior: Appears with a smooth animation, stays for 2-4 seconds, and disappears automatically.
Step 1: Designing the View (ToastView)
We’ll start by creating the visual component. Don’t worry about the appearance logic yet, let’s just design the “capsule”.
import SwiftUI

struct ToastView: View {
    // Configurable properties
    var style: ToastStyle
    var message: String
    var onCancelTapped: (() -> Void)?

    var body: some View {
        HStack(alignment: .center, spacing: 12) {
            // 1. Icon based on style
            Image(systemName: style.iconFileName)
                .font(.system(size: 20)) // Appropriate size
                .foregroundColor(style.themeColor)

            // 2. Main message
            Text(message)
                .font(.subheadline) // Legible but not invasive typography
                .foregroundColor(Color.primary)
                .multilineTextAlignment(.leading)

            Spacer(minLength: 10)

            // 3. Optional close button (UX)
            if let onCancelTapped = onCancelTapped {
                Button(action: onCancelTapped) {
                    Image(systemName: "xmark")
                        .font(.system(size: 14))
                        .foregroundColor(.secondary)
                }
            }
        }
        .padding(.vertical, 12)
        .padding(.horizontal, 16)
        .background(.thinMaterial) // Native iOS translucent effect
        .clipShape(Capsule()) // Rounded shape
        .shadow(color: Color.black.opacity(0.15), radius: 5, x: 0, y: 2) // Depth
        .padding(.horizontal, 20) // Side safety margin
    }
}
Defining Styles (ToastStyle)
To make the component reusable, we shouldn’t “hardcode” colors or icons. We will use an enum to define the message types.
enum ToastStyle {
    case error
    case warning
    case success
    case info

    var themeColor: Color {
        switch self {
        case .error: return Color.red
        case .warning: return Color.orange
        case .success: return Color.green
        case .info: return Color.blue
        }
    }

    var iconFileName: String {
        switch self {
        case .error: return "xmark.circle.fill"
        case .warning: return "exclamationmark.triangle.fill"
        case .success: return "checkmark.circle.fill"
        case .info: return "info.circle.fill"
        }
    }
}
2. The Magic of Modifiers (ViewModifier)
The beginner’s mistake is putting the ToastView inside a ZStack on every single screen of the app. This clutters the code and makes it hard to maintain.
The “SwiftUI way” to do this is by creating a ViewModifier. This allows us to use our Toast as easily as we use a .sheet or an .alert.
Creating the ToastModifier
This modifier will handle:
- Overlaying the Toast on top of the current content.
- Managing the entrance and exit animations.
- Positioning it correctly.
struct ToastModifier: ViewModifier {
    @Binding var isPresented: Bool
    let style: ToastStyle
    let message: String
    let duration: TimeInterval

    // Internal state for the work item
    @State private var workItem: DispatchWorkItem?

    func body(content: Content) -> some View {
        content
            .frame(maxWidth: .infinity, maxHeight: .infinity)
            .overlay(
                ZStack {
                    if isPresented {
                        VStack {
                            Spacer() // Pushes the toast down

                            ToastView(
                                style: style,
                                message: message,
                                onCancelTapped: {
                                    dismissToast()
                                }
                            )
                            .padding(.bottom, 50) // Space for TabBar or Home Indicator
                            .transition(.move(edge: .bottom).combined(with: .opacity))
                            .onAppear {
                                // Start auto-hide timer
                                scheduleDismissal()
                            }
                        }
                        .zIndex(1) // Ensures it's always on top
                    }
                }
                .animation(.spring(response: 0.5, dampingFraction: 0.7), value: isPresented)
            )
            // Important: If the toast changes, restart the timer
            .onChange(of: isPresented) { presented in
                if presented {
                    scheduleDismissal()
                }
            }
    }

    private func scheduleDismissal() {
        // Cancel any pending task to avoid conflicts
        workItem?.cancel()

        let task = DispatchWorkItem {
            withAnimation {
                isPresented = false
            }
        }

        workItem = task
        // Execute after 'duration' seconds
        DispatchQueue.main.asyncAfter(deadline: .now() + duration, execute: task)
    }

    private func dismissToast() {
        withAnimation {
            isPresented = false
        }
        workItem?.cancel()
    }
}
The View Extension
To make usage elegant, we extend View.
extension View {
    func toast(
        isPresented: Binding<Bool>,
        message: String,
        style: ToastStyle = .info,
        duration: TimeInterval = 3.0
    ) -> some View {
        self.modifier(ToastModifier(
            isPresented: isPresented,
            style: style,
            message: message,
            duration: duration
        ))
    }
}
3. Basic Implementation
Now that we have the pieces, let’s see how it’s used in a real view.
struct ContentView: View {
    @State private var showToast = false
    @State private var toastType: ToastStyle = .success

    var body: some View {
        VStack(spacing: 20) {
            Button("Show Success") {
                toastType = .success
                showToast = true
            }

            Button("Show Error") {
                toastType = .error
                showToast = true
            }
        }
        .toast(
            isPresented: $showToast,
            message: toastType == .success ? "Data saved" : "Connection error",
            style: toastType
        )
    }
}
4. Advanced Architecture: Centralization
The approach above has a problem: it requires a @State variable in every view where you want to show a Toast. In a large application, this is tedious. Ideally, you want to trigger the toast from anywhere, even from a ViewModel, without tying it to the local view.
To achieve this, we will use the Environment Object pattern or an Observable Singleton.
The ToastManager
We will create a class that manages the Toast state for the entire application.
class ToastManager: ObservableObject {
    // Singleton for easy access (optional, but useful)
    static let shared = ToastManager()

    @Published var isPresented: Bool = false
    @Published var message: String = ""
    @Published var style: ToastStyle = .info

    func show(message: String, style: ToastStyle = .info) {
        // First ensure reset if one is already showing
        withAnimation {
            self.isPresented = false
        }

        // Small delay to allow exit animation if there was a previous one
        DispatchQueue.main.asyncAfter(deadline: .now() + 0.1) {
            self.message = message
            self.style = style
            withAnimation {
                self.isPresented = true
            }
        }
    }
}
Injection at the Root (App)
We modify the application entry point to inject this manager and place the Toast Overlay just once at the highest level.
@main
struct MyApp: App {
    @StateObject var toastManager = ToastManager.shared

    var body: some Scene {
        WindowGroup {
            ContentView()
                // Inject the overlay HERE, at the root
                .overlay(alignment: .bottom) {
                    if toastManager.isPresented {
                        ToastView(
                            style: toastManager.style,
                            message: toastManager.message
                        )
                        .padding(.bottom, 50)
                        .transition(.move(edge: .bottom).combined(with: .opacity))
                        .onAppear {
                            DispatchQueue.main.asyncAfter(deadline: .now() + 3) {
                                withAnimation {
                                    toastManager.isPresented = false
                                }
                            }
                        }
                    }
                }
                .environmentObject(toastManager) // Available to everyone
        }
    }
}
Usage from any ViewModel
Now, any part of your logic can trigger a toast without knowing anything about the view.
class SettingsViewModel: ObservableObject {
    func deleteAccount() {
        // Deletion logic...

        // Notify the user
        ToastManager.shared.show(
            message: "Account deleted successfully",
            style: .success
        )
    }
}
5. Polish and UX: Taking it to the Professional Level
A basic tutorial ends above. A professional tutorial cares about the details.
A. Haptic Feedback (iOS 17+)
A visual Toast is good, but one that is “felt” is better. SwiftUI introduced .sensoryFeedback.
// In your ToastModifier or root view
.sensoryFeedback(trigger: isPresented) { oldValue, newValue in
    if newValue {
        switch style {
        case .error: return .error
        case .success: return .success
        case .warning: return .warning
        case .info: return .selection
        }
    }
    return nil
}
This will cause the phone to vibrate subtly with the correct pattern based on the message type.
B. Interaction Gestures (Drag to Dismiss)
Sometimes the user wants to remove the message immediately because it’s covering a button. Adding a drag gesture is vital.
ToastView(...)
    .gesture(
        DragGesture(minimumDistance: 20, coordinateSpace: .local)
            .onEnded { value in
                // If user swipes down (positive Y value)
                if value.translation.height > 0 {
                    dismiss()
                }
            }
    )
C. Keyboard Avoidance
One of the classic “Bottom Toasts” problems is that the keyboard covers them. To solve this, we need to observe the keyboard height (KeyboardAvoidance).
However, a more elegant design solution is: If the keyboard is open, show the Toast at the top.
We can detect the keyboard and change alignment:
.overlay(alignment: isKeyboardVisible ? .top : .bottom) { ... }6. Accessibility: Don’t Forget VoiceOver
If you show a Toast and VoiceOver doesn’t announce it, your app is not accessible. Since the Toast is an overlay view that disappears, screen readers often ignore it if not forced.
We must use UIAccessibility.post(notification: .announcement).
Let’s modify our ToastManager or the modifier’s onAppear:
.onAppear {
    // Notify VoiceOver that there is an important new message
    UIAccessibility.post(notification: .announcement, argument: message)

    // Start timer...
}
Additionally, ensure the ToastView has the correct traits:
ToastView(...)
    .accessibilityElement(children: .combine) // Combines icon and text
    .accessibilityLabel("\(style.rawValue), \(message)") // "Error, Connection Failed"
    .accessibilityAddTraits(.isStaticText)
7. Limitations and Final Considerations
Why not use a third-party library?
Excellent libraries exist like AlertToast or ToastUI. However, for basic needs, importing an external dependency adds weight and risk to your project. As you’ve seen, we can build a robust system in less than 100 lines of code. This gives you full control over animations and design.
Conflicts with Sheet and FullScreenCover
This is the “Final Boss” of Toasts in SwiftUI. If you present a Toast in the root view (ContentView) and then open a .sheetor .fullScreenCover, the sheet will cover the Toast, because modal sheets in iOS are new window hierarchies.
Solution: If your app uses many modals, you have two options:
- Local ZStack: Use the
ViewModifierinside the sheet’s content as well. - UIWindow Overlay (Advanced): Create a
PassThroughWindowinSceneDelegate(or its modern SwiftUI equivalent) to inject the Toast into a window superior to the application’s. This guarantees the Toast floats above everything, including alerts and modal sheets. (This requires UIKit bridging code and is a topic for another advanced tutorial).
Implementation Summary
To show a Toast Notification in your project tomorrow, follow these steps:
- Copy the
struct ToastViewto define the design. - Copy the
enum ToastStylefor theme management. - Decide your architecture:
- For a small app: Use the
ViewModifierand the.toast()extension. - For a medium/large app: Create the
ToastManagerand place the overlay in yourApp.swift.
- For a small app: Use the
- Don’t forget to add the accessibility line for VoiceOver.
Mastering these “invisible” components is what separates an application that simply “works” from one that feels polished, responsive, and professional.
If you have any questions about this article, please contact me and I will be happy to help you 🙂. You can contact me on my X profile or on my Instagram profile.