


Rich text editing has long been one of the most complex features to implement in native applications. With the release of iOS 26 and macOS 26, Apple has significantly improved the tools available for working with rich text in SwiftUI. In this article, we will explore how to build modern rich text editing interfaces using TextView and AttributedString in SwiftUI, taking advantage of the latest APIs and capabilities in Xcode.
This tutorial is designed for both intermediate and advanced developers who want to master rich text manipulation in their apps.
🧠 What Is Rich Text?
Rich text allows visual attributes to be applied to parts of a text: bold, italic, colors, font sizes, links, lists, and more. Unlike plain text (String), rich text combines content and style, requiring a more sophisticated and controlled representation.
In modern SwiftUI, this is mainly achieved through:
- AttributedString – A structured Swift type for styled text
- TextView – A view that allows interactive rich text editing (especially for user input)
📦 Requirements
Before you start, make sure you have:
✅ Xcode 18 or later
✅ iOS 26 SDK / macOS 26 SDK
✅ Basic knowledge of Swift and SwiftUI
📘 Introduction to AttributedString
AttributedString is a powerful Swift structure that represents text with attributes. Unlike NSString or NSAttributedString, AttributedString is type-safe and fully integrated with Swift.
Basic example:
import SwiftUI

let attributed = try! AttributedString(
    markdown: "**Hello**, *world*!",
    options: .init(interpretedSyntax: .inlineOnlyPreservingWhitespace)
)
This snippet converts Markdown into styled text with bold and italic attributes.
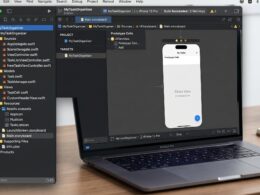
🛠 Step 1: Setting Up a Project in Xcode
- Open Xcode 18
- Create a new SwiftUI project
- Select iOS 26 / macOS 26 as the deployment target
- Create a Swift file called
RichTextEditor.swift
🧩 Step 2: Adding a TextView for Rich Text Editing
SwiftUI in iOS 26 introduces improved support for TextView, a built-in view that allows rich text editing.
Here is a basic setup:
import SwiftUI

struct RichTextEditor: View {
    @State private var attributedText = AttributedString("")

    var body: some View {
        TextView(
            text: $attributedText,
            isRichText: true
        )
        .padding()
        .border(.gray, width: 1)
    }
}
Important: TextView now supports binding directly to an AttributedString, making rich text editing as simple as working with String.
🛡 The isRichText Property
The isRichText flag tells the system to enable formatting controls and rich text features like bold, lists, colors, and links.
🖌 Step 3: Basic Styles and Attributes
Let’s see how to apply attributes programmatically.
Bold and Italic
var bold = AttributedString("Bold")
bold.font = .boldSystemFont(ofSize: 18)

var italic = AttributedString(" Italic")
italic.font = .italicSystemFont(ofSize: 18)
You can combine multiple AttributedString values to build complex styled text.
🔗 Step 4: Adding Links
var linkText = AttributedString("Visit OpenAI")
linkText.link = URL(string: "https://openai.com")
Links are interactive in TextView by default.
🎯 Step 5: Applying Styles from the UI
While you can build styled text in code, most editors let users select text and apply formatting.
Formatting Toolbar
struct FormatToolbar: View {
    @Binding var text: AttributedString

    var body: some View {
        HStack {
            Button("B") { toggleBold() }
            Button("I") { toggleItalic() }
            Button("Color") { applyColor() }
        }
    }

    func toggleBold() {
        if let range = text.runs.first?.range {
            text[range].font = .boldSystemFont(ofSize: 18)
        }
    }

    func toggleItalic() {
        if let range = text.runs.first?.range {
            text[range].font = .italicSystemFont(ofSize: 18)
        }
    }

    func applyColor() {
        if let range = text.runs.first?.range {
            text[range].foregroundColor = .blue
        }
    }
}
🎨 Step 6: Applying Colors
func applyColor(_ color: Color) {
    if let selectedRange = text.runs.first?.range {
        text[selectedRange].foregroundColor = UIColor(color)
    }
}
🧪 Integrated Example
struct RichTextEditorView: View {
    @State private var attributedText = AttributedString("Write here…")

    var body: some View {
        VStack {
            FormatToolbar(text: $attributedText)
                .padding()

            TextView(text: $attributedText, isRichText: true)
                .padding()
                .border(.secondary, width: 1)
        }
        .padding()
    }
}
Advanced AttributedString Details
AttributedString supports many attributes:
.font.foregroundColor.backgroundColor.underlineStyle.strikethroughStyle.link
You can inspect runs like this:
for run in attributedText.runs {
    print(run.range, run.attributes)
}
💡 Best Practices
✔ Use AttributedString instead of NSAttributedString
✔ Modularize formatting tools
✔ Handle selection carefully
✔ Save rich text as Markdown or RTF
🚀 Conclusion
With the enhancements in SwiftUI in iOS 26 and macOS 26, building rich text editors is easier than ever. TextView and AttributedString allow you to create powerful, modern, and highly customizable text editors with minimal code.
If you have any questions about this article, please contact me and I will be happy to help you 🙂. You can contact me on my X profile or on my Instagram profile.