
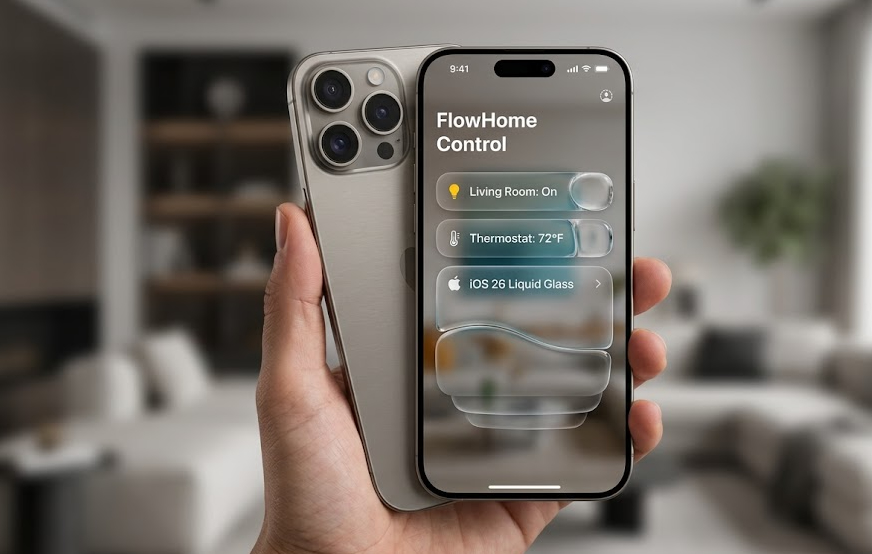

User interface design evolves at a breakneck pace within the Apple ecosystem. As an iOS Developer, mastering cutting-edge visual effects not only elevates the aesthetics of your apps but also drastically improves user experience and touch interaction. One of the most striking and demanded styles today is the fluid glass effect, popularly known as Liquid Glass in SwiftUI. This technique combines frosted translucent surfaces with moving organic shapes, light refractions, and animated gradients that react to the environment.
In this practical tutorial, you will learn how to use advanced Swift programming to create a fully reusable and cross-platform Liquid Glass in SwiftUI component. Using only native tools within Xcode, we will implement this design so that it works perfectly on iOS, macOS, and watchOS apps.
Setting up the workspace in Xcode
To get started, open Xcode and create a new App project. In the configuration menu, make sure to select SwiftUI as the interface and Swift as the main language. If you want to develop a cross-platform app right from the start, select Multiplatform as the initial destination, or add the macOS and watchOS schemes later.
Prerequisites
- Recent version of Xcode.
- Intermediate knowledge of Swift programming and SwiftUI.
- Environment configured for iOS 17 or higher to take full advantage of graphics rendering performance.
Step 1: Creating the translucent glass base layer
The heart of the Liquid Glass in SwiftUI effect lies in the overlapping of translucent layers that blur the background while catching light on the edges. SwiftUI provides native materials like .ultraThinMaterial that simulate glass natively and integrated with the operating system.
Next, we will create the basic structure of our glass card:
import SwiftUI

struct GlassCardView<Content: View>: View {
    let content: Content

    init(@ViewBuilder content: () -> Content) {
        self.content = content()
    }

    var body: some View {
        content
            .padding(24)
            .background(
                RoundedRectangle(cornerRadius: 30)
                    .fill(.ultraThinMaterial)
            )
            .overlay(
                RoundedRectangle(cornerRadius: 30)
                    .stroke(
                        LinearGradient(
                            colors: [
                                .white.opacity(0.6),
                                .white.opacity(0.1),
                                .black.opacity(0.1),
                                .white.opacity(0.3)
                            ],
                            startPoint: .topLeading,
                            endPoint: .bottomTrailing
                        ),
                        lineWidth: 1.5
                    )
            )
            .shadow(color: .black.opacity(0.15), radius: 20, x: 0, y: 10)
    }
}
This wrapper view takes any Swift content and applies a glass container with reflective edges and soft shadows.
Step 2: Adding organic fluidity (The liquid effect)
To transform a simple glass panel into true Liquid Glass in SwiftUI, we need organic movement beneath or within the surface. We will achieve this effect by mixing a TimelineView with animated colored orbs in constant motion within a rendering canvas.
We will create a dedicated view for the liquid background that will simulate the fluidity:
struct LiquidBackgroundView: View {
    @State private var animate = false

    var body: some View {
        TimelineView(.animation) { timeline in
            let now = timeline.date.timeIntervalSinceReferenceDate
            let angle = Angle(radians: now)

            Canvas { context, size in
                let w = size.width
                let h = size.height

                let xOffset = cos(now) * 30
                let yOffset = sin(now) * 30

                context.fill(
                    Path(ellipseIn: CGRect(x: w * 0.2 + xOffset, y: h * 0.2 + yOffset, width: w * 0.5, height: w * 0.5)),
                    with: .color(.purple.opacity(0.7))
                )

                context.fill(
                    Path(ellipseIn: CGRect(x: w * 0.4 - xOffset, y: h * 0.4 - yOffset, width: w * 0.6, height: w * 0.6)),
                    with: .color(.blue.opacity(0.6))
                )

                context.fill(
                    Path(ellipseIn: CGRect(x: w * 0.1 + yOffset, y: h * 0.5 + xOffset, width: w * 0.4, height: w * 0.4)),
                    with: .color(.pink.opacity(0.5))
                )
            }
            .blur(radius: 50)
        }
    }
}
This Swift code draws geometric shapes that move continuously and smoothly. By applying a high blur filter with .blur(radius: 50), the shapes merge, creating a moving luminous liquid mass.
Step 3: Final integration of the Liquid Glass component
Now we will combine the animated liquid background with the translucent glass container to get the final finish of the Liquid Glass in SwiftUI:
struct LiquidGlassContainer: View {
    var body: some View {
        ZStack {
            LinearGradient(
                colors: [Color.black, Color.indigo.opacity(0.8)],
                startPoint: .top,
                endPoint: .bottom
            )
            .ignoresSafeArea()

            LiquidBackgroundView()
                .ignoresSafeArea()

            GlassCardView {
                VStack(spacing: 16) {
                    Image(systemName: "drop.fill")
                        .font(.system(size: 48))
                        .foregroundStyle(
                            LinearGradient(
                                colors: [.white, .cyan],
                                startPoint: .topLeading,
                                endPoint: .bottomTrailing
                            )
                        )

                    Text("Liquid Glass")
                        .font(.title)
                        .fontWeight(.bold)
                        .foregroundColor(.white)

                    Text("Native SwiftUI interface tutorial for the entire Apple ecosystem.")
                        .font(.body)
                        .multilineTextAlignment(.center)
                        .foregroundColor(.white.opacity(0.8))
                }
            }
            .padding(.horizontal, 20)
        }
    }
}
By compiling this code in Xcode, you will see how the movement of the colored spheres behind the card creates a realistic optical effect of liquid refraction through the frosted glass.
Adaptation for macOS and watchOS
Any experienced iOS Developer knows the importance of adapting visual components to the different operating systems of the Apple ecosystem. Although the SwiftUI framework is declarative and unified, there are important considerations regarding processing power and human interface guidelines.
Adaptation for macOS
On macOS, the Liquid Glass in SwiftUI effect greatly benefits from the screen size and the graphic power of Apple Silicon processors. You can enable mouse interaction by making the light reflection follow the mouse cursor:
#if os(macOS)
extension View {
    func macHoverEffect() -> some View {
        self.onHover { hovering in
            // Custom logic to adjust opacity on mouse hover
        }
    }
}
#endif
Adaptation for watchOS
On small-screen devices like the Apple Watch, battery consumption and performance are critical. The constant calculation of animations in TimelineView can drain energy quickly. For watchOS, it is advisable to replace the continuous movement with a static gradient or a simplified animation:
#if os(watchOS)
struct OptimizedWatchGlassView: View {
    var body: some View {
        RoundedRectangle(cornerRadius: 16)
            .fill(.ultraThinMaterial)
            .overlay(
                RoundedRectangle(cornerRadius: 16)
                    .stroke(.white.opacity(0.3), lineWidth: 1)
            )
    }
}
#endif
Optimization and performance for the iOS Developer
Working with translucent layer rendering, deep blurs, and frame-by-frame animations requires caution. If you overuse these effects in lists or composite views with many elements, your app’s frame rate will drop.
Performance best practices
- Avoid nesting multiple materials: Do not place a view with
.ultraThinMaterialinside another that already uses translucency. This multiplies the rendering passes the GPU must perform. - Use off-screen drawing sparingly: The
.blur()modifier will consume a lot of resources if applied over complex content. Always apply it over simple views like vector paths or geometric shapes. - Take advantage of Instruments in Xcode: Use the Xcode profiling tool to verify that the interface maintains a constant 60 or 120 frames per second during animations on real devices.
Summary of features by platform
| Platform | Graphics Performance | Implementation Recommendation |
|---|---|---|
| iOS | High | Full animation with TimelineView and haptic feedback |
| macOS | Very High | Effect extended to side panels and support for mouse events |
| watchOS | Limited | Use of static materials or very low-energy impact animations |
Conclusion
Using Liquid Glass in SwiftUI allows you to create fascinating interfaces that visually captivate users. Through this tutorial, we have seen how modern Swift programming and the tools provided by Xcode make it possible to implement complex optical effects in a few lines of code.